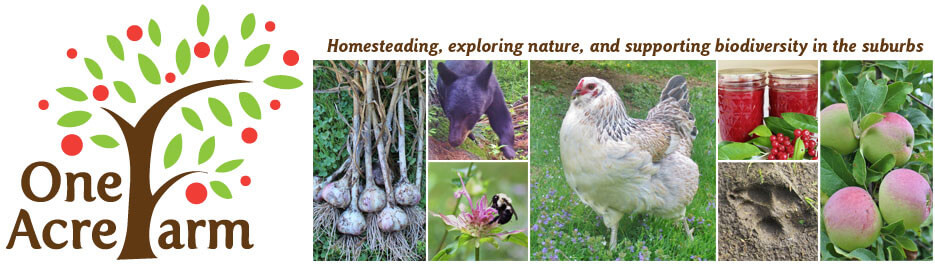


How to make maple syrup in your backyard. These are 2 jars of our own liquid gold.
This is the 2nd of a 2 part series on maple sugaring. In How to Make Maple Syrup I, I covered choosing trees and collecting sap. In this part, I describe pros and cons of boiling off indoors vs. outdoors, show our own backyard evaporator, discuss filtering and canning, and conclude with a few words on color and flavor.
Overview of how to make maple syrup as we do it
We have 6 taps which produce a total of 60-80 gallons of sap, yielding 1.5 – 2 gallons of syrup per season. We boil outdoors a few afternoons per week, and on some of the in-between days, I finish boiling the concentrated sap to the syrup stage in the kitchen.
- Evaporate over fire outdoors, scooping out particles and foam, as we see them, with a small, stainless steel, fine mesh strainer, until sap is gold but not yet as thick as syrup.
- Take concentrated sap indoors and filter through coffee filter.
- Store in refrigerator until ready to complete the boiling off.
- Boil concentrated sap in kitchen until it reaches a temperature of 7 degrees over the boiling point of water (varies with elevation).
- Skim off foam, if necessary.
- Pour into sterilized canning jars, leaving appropriate head space, and cover with sterilized lids and rings.
- Process in boiling water bath for 10 minutes.
- Remove jars from water bath and store at room temperature. (We store for up to a year, but I’m not sure what the official recommendation is.)
Where to boil off the sap
Small producers like backyard sugarers have three options, and there are pros and cons to each.
Boil it off all in the kitchen
If you’re only making a few quarts of syrup and you have a good range hood with a powerful fan, you might find it convenient to do all the boiling off in the kitchen. I’ve actually boiled our season’s worth of sap (60-80 gallons total) in the kitchen, in past years. It took a long time but it did not result in a sticky coating all over the kitchen (some sources say it does, but it didn’t), and the moisture was welcome, given the extremely dry air here at this time of year. The resulting syrup was extremely pure in flavor. The downside of boiling off indoors is that it’s a very slow process.
Do most of the boiling outdoors over fire, then finish in the kitchen
This is what we do now. Boiling outdoors, where the cold, dry air quickly sucks the steam up from boiling sap, spread out over large, flat pans, goes much more quickly. The disadvantage is that there is usually some scorching of the solids on the sides of the pan as the sap boils down. Little pieces of this char fall into the sap and can give the syrup an off flavor. The longer that stuff cooks in the sap, the stronger the off flavors. So I bring it indoors when it’s beginning to turn gold, filter through a coffee filter, and finish boiling in the kitchen.
Boil the sap to syrup all outdoors
This is fastest and easiest, but outdoors is a less controlled environment, and you can expect off flavors in some batches. You can scoop out some of the char with a strainer, but some of it will be small enough to pass through the strainer, and won’t be removed until you filter through something like a coffee filter. You will want to filter at the end, and if you don’t want those particles cooking in your syrup throughout the entire process, you’ll want to also filter it when part way done.
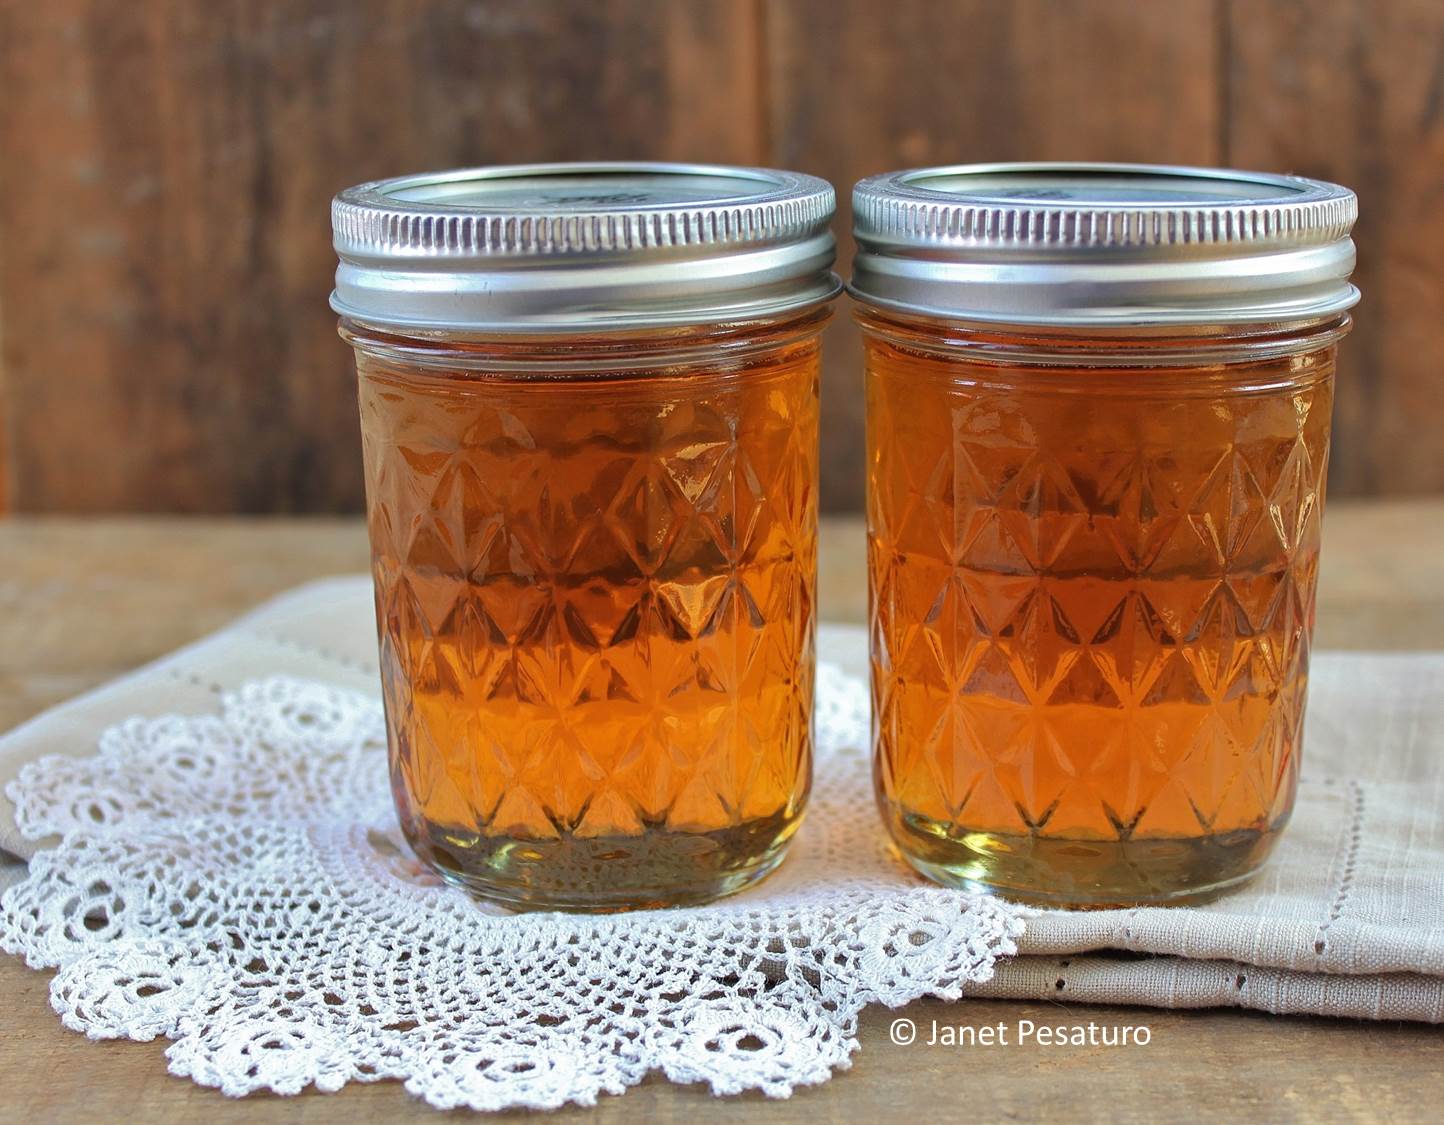
An outdoor evaporator

Maple sap evaporator made of concrete blocks, buffet pans, and HVAC duct pipe
My husband built a simple evaporator made with cinder blocks based on this one, and 4 inch deep 12 x 24 buffet pans, like these: Excellante Full Size 4-Inch Deep 24 Gauge Anti Jam Pans
We configured the blocks slightly differently, and added a base of 4 x 8 x 16 inch concrete blocks. With this, we can boil about 10 gallons of sap down to 1 gallon in an afternoon, before bringing it indoors to filter and finish boiling it to syrup.
One problem with the above set-up in our photo, is that smoke could come up over the pan in the front, giving the syrup a slightly smoky flavor. So we got an additional block and adjusted it slightly, so that the top layer of blocks was closed. We add wood to the fire through the opening in the bottom layer, and most of the smoke comes out of the pipe.
Evaporator adjusted so that pans are completely surrounded by blocks, keeping smoke away from sap. Evaporator even doubles as a wienie roaster.
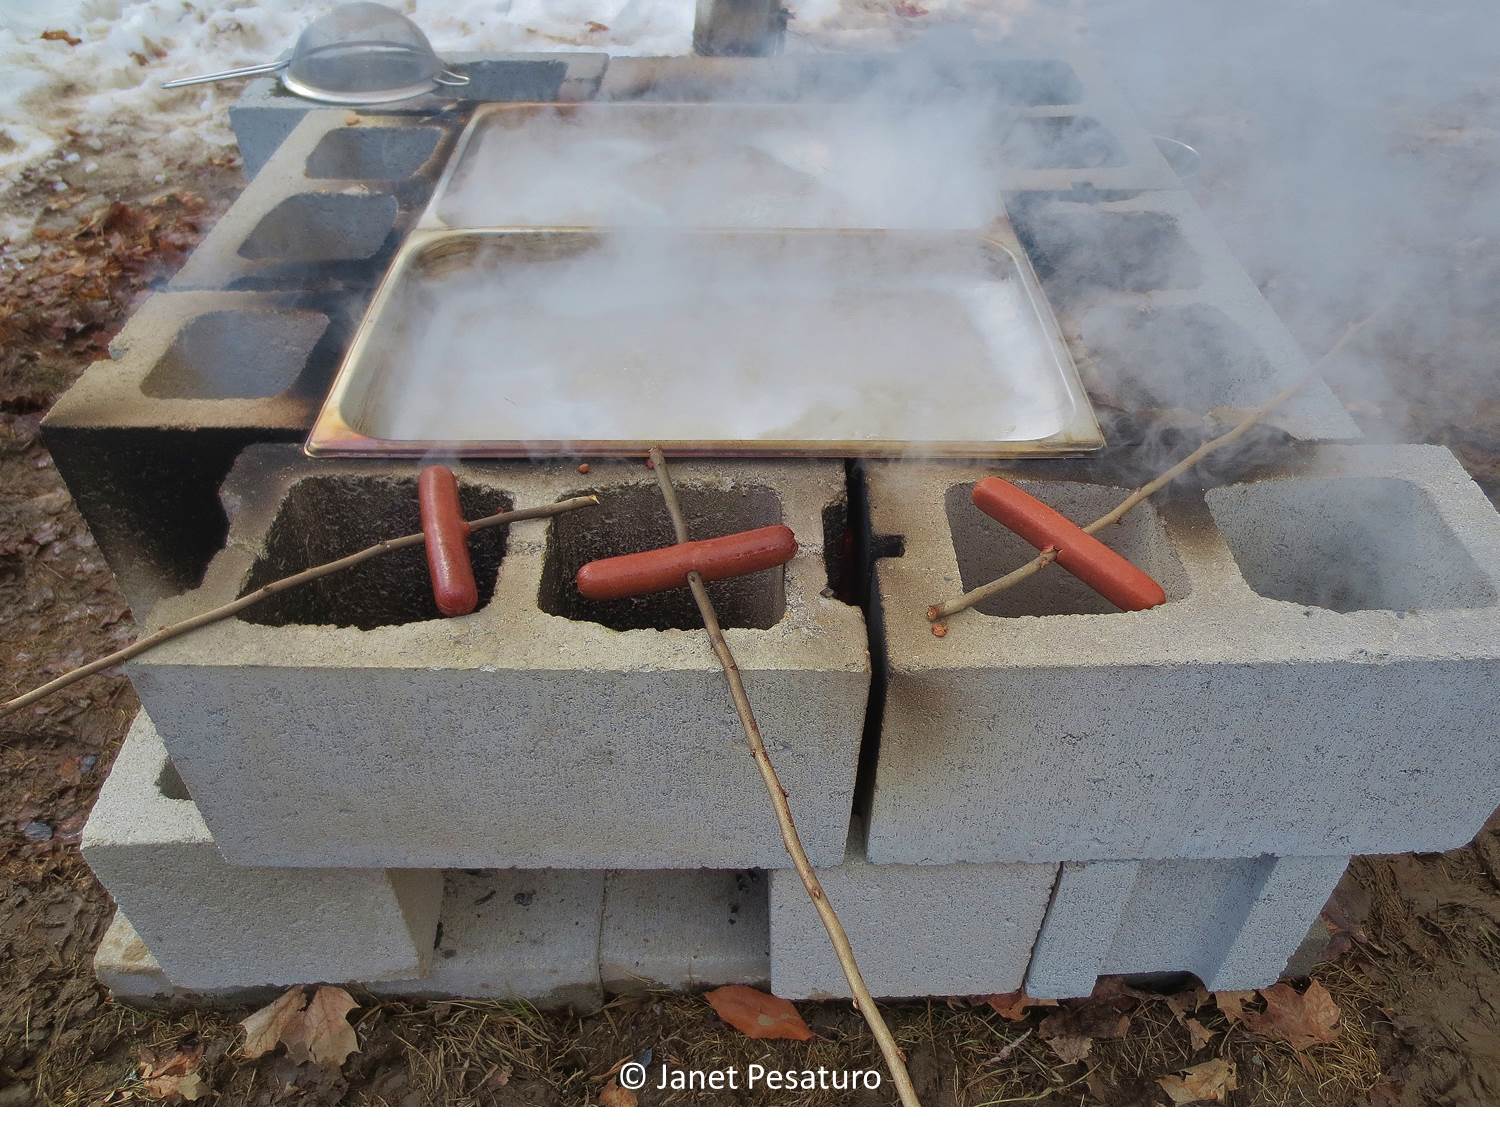
Should you filter the finished syrup?
If you notice any dark solids in the syrup, you should definitely filter again. If you filter that stuff out, immediately after bringing the concentrated sap indoors, you shouldn’t have any brown or black solids in your finished syrup. Should you still filter it?
You will notice whitish, feathery looking solids in the syrup. If you don’t filter, they make the syrup looks cloudy at first, but eventually settle to the bottom. This material is sometimes called niter, but I think that is misleading, at best, since niter technically refers to potassium nitrate. There might be some of that in this sediment, but studies have shown the main constituent is calcium malate, a compound that gives certain fruits a pleasantly sour taste. However, there is also some sugar in it, for I have filtered it out and tasted it. It is sweet. So I prefer the other common name for those whitish solids: sugar sand.
Should you filter out the sugar sand? Conventional wisdom and many sources say yes, claiming that it gives the syrup an off flavor. I believe that is incorrect. I don’t filter our finished syrup, and it is delicious. I agree with these Chautauqua County, NY producers, that filtering maple syrup is only for aesthetics, and removes harmless, naturally occurring substances.
The important stuff to filter out is the black char and any other debris that gets into the sap, but I would not wait until the syrup is finished to filter that out. The longer it sits in the boiling sap, the more likely your syrup will have an off flavor.
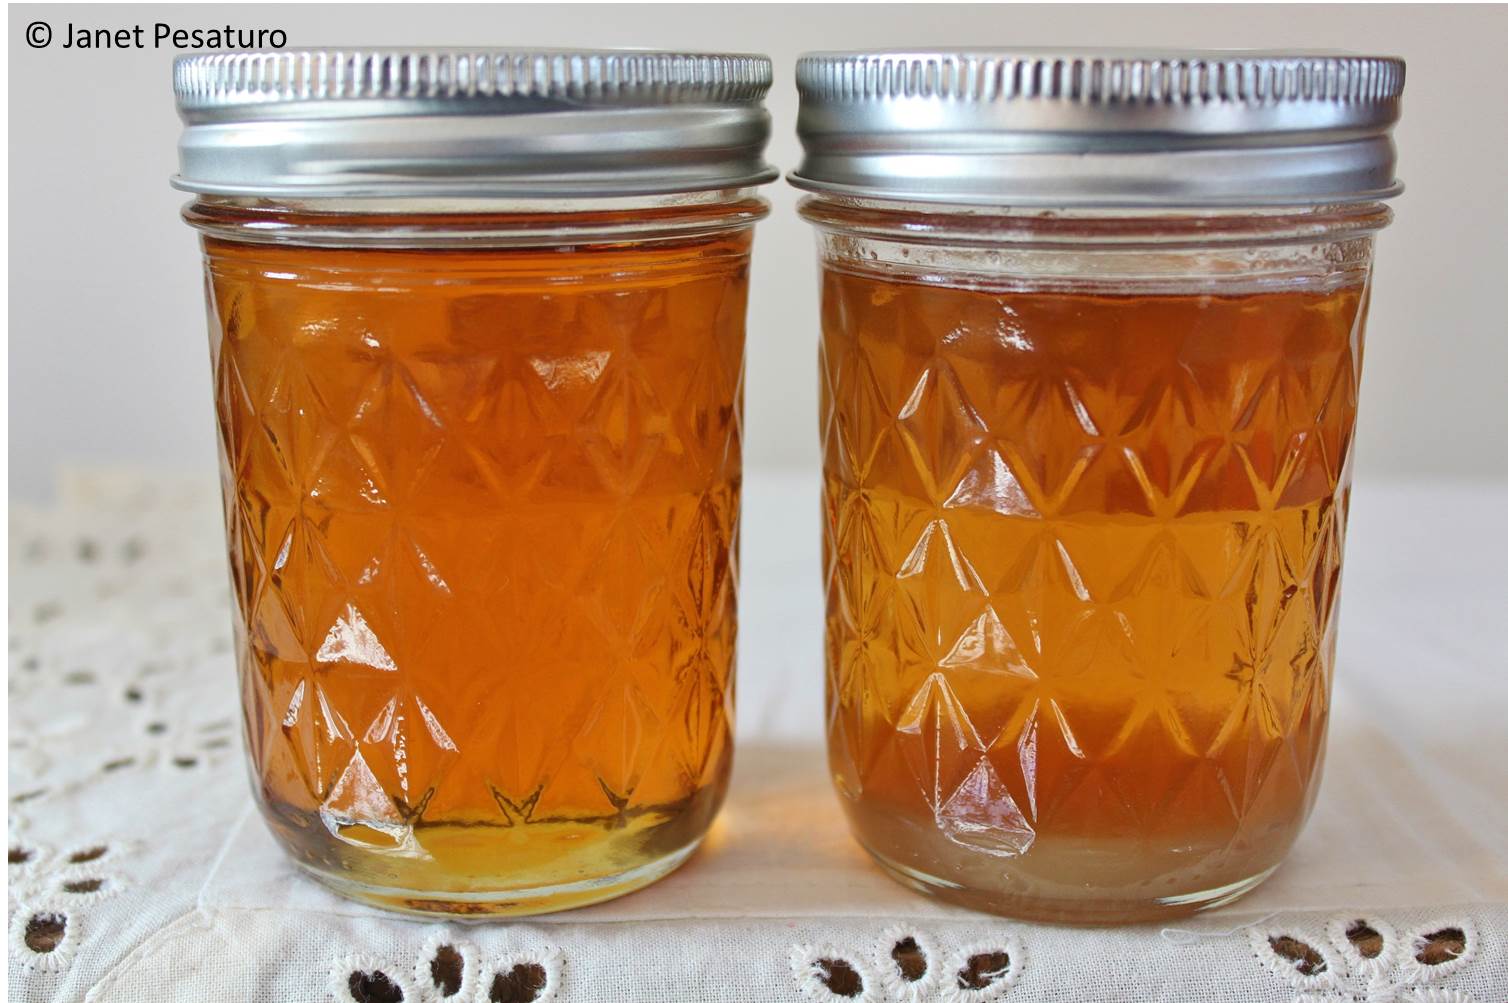
Filtered syrup at left. In unfiltered syrup at right, you can see a whitish sediment, “sugar sand”, at the bottom.
Canning the finished syrup
I want to be able to safely store the syrup at room temperature for months, so I pour it into sterilized 8 ounce canning jars, leaving appropriate head space, and process it in a boiling water bath for 10 minutes. Same process as for jellies and jams.
Color and flavor of maple syrup
The color and flavor of maple syrup depend on several factors:
- Time during season when sap was collected
- Genetics of the tree
- Soil type
- Weather conditions
- Processing
The chemical composition of maple sap changes over the course of the season, but more importantly, the increasingly warm weather causes bacteria in the environment to proliferate more quickly, and colonize the sap as it is collected. These bacteria convert sucrose, the dominant sugar in maple sap, to glucose and fructose. When the sap is heated, glucose and fructose (but not sucrose) can react with amino acids in the sap. This produces a mixture of molecules that cause browning and give the syrup a stronger flavor. Known as the Maillard reaction, this is the chemical process in cooking which creates the yummy flavors of well browned foods.
Our maple syrup tends to be lighter on color and more delicate in flavor than syrup we’ve tasted from other New England farms. We do get darker syrup later in the season, but it only gets about as dark as medium amber. Maybe this has to do with factors, like soil and tree genetics, that we can’t control. Some people might find it frustrating that they can’t get their syrup to look and taste exactly like the syrup they buy in the store, but I think it’s kind of cool that geography and genetic diversity factor into maple syrup.
Sources:
- Biology of Maple Sap Flow, St. Johns University
- The Different Colours and Tastes of Maple Syrup, Danbrie Farms
- Chemistry of Maple Syrup, by Steven Childs
- Cornell Sugar Maple Research & Extension Program
I love receiving comments and questions! Have you made maple syrup? What are your thoughts on boiling off, filtering, and canning?
Shared on: Backyard Farming Connection #72, Wildcrafting Wednesday #129, Fluster’s Creative Muster #63, Wake Up Wednesday Link Party #8, Waste Not Want Not Wednesday #65, Wicked Awesome Wednesday #152, HomeAcre Hop #62, Homemaking Party, Home and Garden Thursday, Think Tank Thursday #73, From the Farm Blog Hop, Real Food Fridays #30, Freedom Fridays #20, Farmgirl Friday blog hop, Simply Natural Saturdays, Heritage Homesteaders Hop #5, Simple Life Sunday #10, Thank Goodness it’s Monday #63, Homestead Barn Hop #152, Mostly Homemade Mondays #72, Natural Living Monday, Down Home blog hop #81, Wellness Wednesday #41, Mountain Woman Rendezvous #39
Pingback: How to Make Maple Syrup I: Choosing Trees and Getting Sap - One Acre Farm
I love this – so interesting! We don’t have any sugar maple trees here in California, but I do have a maple tree!!?? Not sure what kind it is – I think it’s a Rock Maple. Probably no sugar, but it is pretty! I have heard you can also tap birch and black walnut! Thanks for showing your process. It is on my bucket list to make it back to New England during sugaring season to see this whole process with my own eyes! Question: Does it smell wonderful when the sap is boiling outside? I have always imagined that if a lot of people are boiling sap at around the same time, the aroma in the neighborhood would be heavenly!
Hi Vickie, you’re right, sugar maples don’t grow in CA. Rock maple is actually a term we sometimes use out here for sugar maple, but in CA it must refer to some other maple, maybe the rocky mtn maple. I think you can tap any maple, but the sap is more dilute than that of sugar maple, requiring more time and fuel to process. Yes, syrup can be made from sap of birch and a number of other trees, but flavor is not like maple syrup.
Very few people make syrup in their backyards around here, so you can’t smell that maply smell throughout the neighborhood, but it smells really good right near our evaporator when we are boiling off. 🙂
Hi Janet,
My Dad used to make Maple syrup, using predominately Red Maple. The syrup is not as sweet as Sugar Maple, but is still delicious. He tries using Silver Maple one year and it tasted bitter, so I wouldn’t recommmend it! One year he fell asleep while boiling the sap down and my mother arrived home to find the Kitchen ceiling covered in dripping blobs of maple syrup!. Thank you for your information and pictures..especially the pics on how to identify the buds!
The final product will be the same in sugar content regardless of what tree is used. Maple syrup is such at a specific percentage of sugar. We say 7 degrees above boiling because that is the temp your happen to reach when you hit the other parameter for sugar content. Alternatively you can use a tool to measure sugar content to decide when to stop boiling.
I primarily tap silver maples and while my red maple and one silver maples are much higher in sugar content than the others due to genetics of the trees, I have found no difference in the taste of the finished product.
Great post with a lot of good information that I was not aware of. I admire you for your ability to make your own equipment and love the finished product. Homemade maple syrup has to be so much healthier than store bought and the organic is so expensive. Visiting from the Home acre Blog Hop! Have a wonderful healthy day!
Thanks, Marla!
Organic?? Isn’t all maple syrup organic? You take the sap, filter it, boil halfway, filter again, and boil until it is syrup (219 degrees). What is not organic about it?
Organic maple syrup is produced in “sugar bushes” (woodlands where sugar maples grow) managed without the use of synthetic fertilizers or pesticides. If it’s not certified organic, they can and often do use them.
In many area there is contamination from crop spraying or roadside salt. When we had our farm it was isolated and the nearest dairy farm didn’t spray so we could have a certification for a farmer to farmer based program. To get goverment certifcation it’s only for large producers and costs alot of money.
Our sap reaches 219 degrees but is still runny. How long should it stay boiling at the 219 to reach the syrup stage?
it will stay runny until cool…upon cooling, syrup boiling at 219degrees F will have the correct consistency upon cooling.
Oh my! This looks and sounds so fabulous! I can’t believe you MAKE your won maple syrup! You are my inspiration today…..
🙂
“hugs” Crystelle
Crystelle Boutique
Happy Spring!!
I live on the west coast but, enjoy canning. And had to drop by to see how it was done. I found you by blog hop. I am pinning this to my canning page for others. Great post. Drop by anytime!
Thanks for checking it out, Theresa. I’ll be glad to visit your blog!
I think our syrup tastes so bad! We have tried beginning, middle, end of season, filtered at different stages. We boiled inside and outside, stainless steel and turkey roasters-always the same taste! Can anyone help?
I always like to see how other people boil. We use a 5 gallon drum and then use everything else the same way you do. We store it in the barn when we’re finished for the season. We “cook” out too!:) toasted marshmallow & peanut butter sandwiches are our fave!
Funny, I love to see how other people do it, too. I never thought of pb and toasted marshmallow sandwiches – we’ll have to try that!
Pingback: 15 Trees for a Wildlife-Friendly, Edible Landsape - One Acre Farm
Pingback: How To Make Maple Syrup | WV Preppers
Great information. We are tapping some of our trees in the spring and I”m wondering instead of using an open fire could you use a propane tank flame and pot like the ones use with outdoor frying turkey’s
Jennifer, it takes longer to boil off the sap in a pot, but you can certainly do it. The big flat pans work really well, because so much surface area of the sap is exposed to the air, that it boils off very quickly.
That will work fine but DONT use an alumnium pot. (most turkey fryers are alumnium) Use Stainless Steel. The Alumnium will give the syrup a metalic taste. (Harmless but very off tasting).
Wish I had read this post before I started. Didn’t realize this was an issue and can definately notice a difference. Luckily I only did a small test batch. Great advice. Thanks.
Yes – always use non-reactive metals when processing your syrup. 🙂
For 20 years I put up to 50 taps on the red maples (aka “swamp maples”) on my NY property and had yields that ranged from 35:1 to 70:1, depending primarily on the weather. I first boiled outside on a “Hobbyist” evaporator using recycled water heater propane burners, then finished inside on the stove. Inside I used porcelain-steel turkey roasting pans and filtered through coffee filters multiple times. I noted that sap reacts with aluminum and discolors the pan.
My taps are made from 7/16″ x 3″ wooden dowels drilled out. Milk and cider jugs. Like honey, maple syrup can keep almost indefinitely. I have and enjoy syrup I bottled 25 years ago.
I now live in a maple tree-less neighborhood, so I have reverted to teaching homeowners and school groups how to do “winter farming.”
“Got Maples? Make Syrup!”™
Yes we bought an outdoor burner that can hook to a BBQ grill tank and boiled our sap, it has worked wonderfully.It is quite fast and not that expensive{using propane}. We brought the sap in when we had probably half to a gallon of sap left to finish it off inside.
I have boiled off approximately 30 gallons of sap this year using a turkey fryer I guess it can be kind of expensive as I found that one tank can boil 20 gallons down to where I have to bring it inside the house and finish it off.
We got a fish fryer. It works good. Then finish inside on my gas stove.
This is one of the best how-tos for small maple syrup tapping. Thank you for posting. We have 3 maple trees and plan to tap for the first time this spring.
Do you need to stir the syrup as it evaporates?
Thanks, Angela! No, you don’t need to stir it as it evaporates. If you are boiling it outside, however, it’s a good idea to strain out as much of the black solids as you can, as it evaporates, as I describe in the post.
I would advise AGAINST stirring it, especially as it get close to being syrup. Just keep an eye on it, and skim or strain out anything char pieces or anything that might fall in. Also, if boiling outside esp. over wood try to make sure to skim off the foam periodically; doing that helps reduce the amount of char forming on the sides of the pan which makes less char fall into the sap and less cleanup later.
wonder if someone can help, my maple syrup has a very fuzzy cloud on the bottom of the jars. Looks like something growing, I’ve heard of sugar sand, niter, can I refilter my already processed jars and reseal in water bath,
We have the same problem, but it sure tastes good! I am interested if anyone else has any suggestions
Sigar sand. You can refilter and syerilize the jars and repack it. Or simply be careful and don’t disturb the nitre on the bottom.
Pingback: Tapping Trees for Syrup
Pingback: My Week on Wednesday and Syrup Season » Once Upon a Time in a Bed of Wildflowers
Great information! We have made syrup for our family after watching a demostration at a local nature preserve. We used a larga cauldron (found it in a wagon shed, it was used to make apple butter) over an open fire. We, like you, finished it inside on the kitchtn stove.
I think this year, we will “graduate” to build an evaporator similar to yours.
We did not use a hot water bath after pouring it into containers, and I had only one bottle develop some mold. I would like to try and boil it like you do this year, just in case. When you say “appropriate space at the top of the jar”, what do you mean. I plan on using 8oz jars as well.
Thank you! I love reading your articles!
I also do not typically use a hot water bath, and I have never had a jar mold or spoil. As long as the syrup is boiled to the correct finished brix/density, it is very resistant to spoilage. What I do is fill the jars with fresh very hot syrup, then screw the lid on and flip them upside down for a while – probably 15-30 mins. – until the lid is as screaming hot as the contents. Then I flip it back over to cool. This almost always results in a sterilized lid and sealed jar on its own.
RE: appropriate headspace – leave a little space under the lid, don’t fill it all the way to the top, same as for most canned goods. HOWEVER, that said… if you are going to try to use my ‘flip method’ described above, fill the jars a little bit higher with the hot syrup than you want them to be when they are at room temperature. That is, my hot syrup always ‘shrinks’/contracts a little bit in the jar as it cools, and unless it was filled slightly high to begin with, it can give the appearance of an underfilled jar.
I realize I’m being a bit OCD with the water bath step, but I promote that for 2 reasons. 1. I want the sealed jars to last for two years at room temperature. Sometimes we make enough syrup for 2+ years, which is great because we don’t have to tap the following year, but I want to be extra sure that syrup is sterile. 2. I’m covering my butt here, as someone providing info to the public. I don’t want someone coming after me because they got sick from improperly canned or stored syrup that they made using my instructions.
Well, until last fall, I still had 2012 syrup sitting on the shelf that was still sealed and good… 🙂 I also still have many jars of my 2014 ‘personal batch’ (also known as dark-as-tar but delicious) left over that are in a fine state. Proof of the flip-thingy concept at least. I always use clean equipment and jars; I have had a less than a handful lose their seals over the years, but I just take those and use them for myself. No spoilage yet. The high sugar retards most things, so I suppose the worst-case I’d expect is visible mold or perhaps some fermentation.
It’s okay to be OCD. There is nothing wrong with using a water bath and I am certainly not judging, especially when it comes to educating the public as you point out.
If any does spoil, simply reheat it back to 7 degrees over boiling point and it is as good as new.
No one water bathes their syrup. You can at proper temp and turn the jars so the hot syrup touches the lid. When cool flip them over. Properly canned syrup needs to be stored in a dark cool place. It keeps a long time.
Hi Chiara, by leave appropriate head space, I mean don’t fill the jar all the way to the top. Leave about the top 1/2 inch empty, as room for expansion. Same as what you would do when you can jelly or jam.
I’ll think you’ll like using an evaporator with big flat pans. It boils off very quickly. Good luck, and have fun!
Thank you!
I really enjoyed your article. I have only 2 trees. Neither is a sugar maple, but I tap them anyway. I pre-concentrate the sap by removing the frozen ice from the buckets before setting them to boil. The freezing process separates most of the sugars from the water and reduces the time needed to concentrate the sap. Very important as I’m already working with a lower quality sap. My syrup is about the same color as yours, and tastes delicious.
Kimberly, I’ve read about that strategy of removing the ice. People do it even with sugar maple sap. If you keep track of how many quarts of sap it takes to make 1 quart of syrup with your particular trees and with removing the ice, I’d love to know. What kind of maples do you use?
I’ve never bothered to identify them, except that they aren’t sugar maples. It does take an awful lot of sap to make syrup. I think last year I used almost 20 gallons and got almost a quart of syrup. I have no idea how much ice I pulled out. I have a neighbor down the street with an empty lot. I’m considering asking him to let me plant some sugar maples, along with some other edibles. I could keep him supplied with fresh nuts and berries while we wait for the maples to mature 🙂
20 gallons making 1 quart is an 80:1 ratio, which says one of the non-sugar maples, as you already know, but doesn’t tell us which one. If you do plant sugar maples, look into a new technique being developed, to tap sugar maple saplings. If it works for you, you won’t need to wait so long for your trees to grow.
Different maples produce various sugar content. Removing ice is good because that’s basically water. Sugar maples are the best then it goes down from there. Try Mapletrader forum and Sugarbushinfo. For great info.
My trees are all sugar maples, and they are even more sugary than normal because they are all large-canopied wolf trees. They are around 30-34:1 ratio normally, but by taking out the ice I can get it down to 25-28:1 no problem, sometimes even with just one real good round of freezing.
I use 2gallon aluminum buckets, and I actually love it when they freeze over for this very reason.
Good morning and thank you for posting an affordable evaporator. I love this idea! I was wondering what your thoughts are regarding using charcoal vs wood as a heat source? Thanks and have a fabulous weekend.
Hi Rahshal, we use wood because we have a lot of it, but if you live where firewood is hard to come by, coal might be a good idea. Beyond that, I don’t have any recommendation. Yes, this concrete block evaporator is very affordable and has worked extremely well for us. Happy sugarin’!
I am in northern Ohio and have three maples of unknown variety that I tap. I usually figure on 8-10 gallons of sap per quart of syrup (32-40:1), but his year the ratio is only about 25:1. I boiled last Sunday and 11 gallons of sap yielded 1 3/4 quarts of excellent amber syrup. I think it may be connected to the historically cold winter which we just had. The sap is so sweet you can actually taste the difference from previous years. I will finish tapping the maples this weekend and tap the black walnuts next. Walnut syrup tastes different than maple but is perhaps even better. Or maybe just “more exotic”. We grow and preserve a lot of our own food and consider the whole sugaring process to be an annual act of renewal and promise.
Hi Chuck, 25:1 is an amazing ratio, and I can’t imagine it’s anything other than sugar maple. The latter averages 40:1, I am told, but some years I’ve gotten much better – maybe as good as 30:1. I wish I had some black walnuts to tap. I would love to taste it.
It is interesting to note the wider range of sugar content in the trees. After growing a silver maple in my back yard for 25 years, it was finally big enough to tap this year. I was shocked to find that the sap measured 4% sugar. After a week of tapping, the sugar content has dropped to 3.5%. The syrup is very light in color and I get a lot of sugar sand accumulating in the bottom of the bottle.
I live in Michigan. All maples can be tapped for sap. All taste great! I’ve done black walnut also. Very good. Just as sweet and a slight nutty taste. Birch is next. Box elder is also a maple. And yup its yummy!
We boil down out side. Seems to me…
the more sap we add as the day goes on the darker the concentrate is. Just a thought. We can usually fill a 5 gallon bucket in a day or 2. But this year it has been very slow. The one thing you can’t control is weather. And that’s the key to sap. A 5 gallon bucket gets me a pint of syrup. And today. Slow flow its snowing AGAIN!
Yes, if you keep adding sap to the original batch, the syrup will be darker, because the earlier sap will have boiled a lot, making the Maillard reaction (described in the post) make more of the sugars react with amino acids. The syrup comes lighter if you just boil one batch of sap all the way to syrup without adding more sap as you go.
Another thought… you can mix all maples together I have 2 silver maples 2 boxelders and 3 sugar maples all tapped. If you keep them separate I’ve found that silver maple and sugar maple taste and look the same box elder however has a slight buttery taste and is lighter in color but if I don’t have enough SAP to boil I’ll just mix them all. I don’t mix Tree type I keep walnut separate from birch… birch separate from maple and so on.
Crystal, that’s good info on the boxelder! I may have one of those in the woods next to our yard, and if so, will try tapping it next year.
Hi Janet,
Thanks for the great article, it helps a lot to use some other people idea for home maple syrup production.
I live in Quebec, Montreal area so we are not allowed to open fire outside, so I use propane to evaporate using a SS Boll. I am getting some black particles from the burned sap on the wall of the boll. And I am finishing on a stove inside just before the end product is ready (at around 215 F). I tried to use a coffee filter but the sap will not flow, am I missing something, it will be sitting there forever. I think to try chees cloth made of cotton, do you recommend this method?
Many thanks again,
Henri
Hi Henri. I found that cheesecloth didn’t catch the particles, even using several layers of it. I found that it did flow through the coffee filter really quickly, but it might depend on the brand of filter. I bought cheapy filters, and doubled them, because it was flowing through TOO quickly. Also, if you are filtering when it’s already thick and at or near the syrup stage, it will go slowly. I filter well before the syrup stage for precisely that reason.
I do a final filtering through a linen hanky (or any other fine-threaded cloth) right into a sterilized bottle. The ideal bottle is a glass soy sauce or ketchup bottle; makes for great display.
“Got Maples? Make Syrup!”™
Sleepy Hollow, NY
Today I read that doubled flannel will work as a filter too.
I use my woodstove in the basement. Already heating the house, so might as well boil sap for free!!!!
Thanks for spreading the information about home production of maple syrup. I love that you are so self sufficient. We just closed the season a day ago. We have 21 taps, all on sugar maples. The weather was not overly cooperative this year so the season was very short for us. We produced 4 gallons of syrup, mostly light to medium amber colored. Two days -very warm- produced very dark and strong maple flavored syrup. We evaporate outside and finish off inside. We filter the sap before we evaporate it, filter again after the evaporation and do a final filter of the syrup. The result is crystal clear syrup. Since we give most of it away to family and friends who may not understand what sugar sand is, this seems best. I would hate to have them throw out the syrup because they thought it had spoiled. We have had friends who threw out their gift of raw honey when it crystallized, thinking it had molded.
Wow, 21 taps – that is impressive, Martha. With your description of the weather pattern and sap run this year, it sounds like you are in the northeast, too. It was a terrible year for maple sugaring here. Last year was fantastic, however, and we still have some of last year’s yield. Good point about filtering. If I were selling it or giving a lot of it away, I might filter out that “sugar sand” as well, because people are used to seeing crystal clear syrup in the store. We don’t produce as much as you do, so we only give away a little, but when we do, we have to explain what that white stuff at the bottom is!
I was very happy to read this article. My husband and I are in our second year of sugaring. Our first batch this year turned out perfect. Our second batch was lighter and contained the white flakes you described. We too were told it could be niter. We didn’t have this issue last year. It’s nice to know we aren’t alone. We went ahead and poured off all of the good syrup and re-canned it. We have one large jar that contains the syrup with sediment. I plan on making it into maple sugar. Thanks again for the information.
Just a question about the water bath….I assume the starting water needs to be 180 degrees also when you put the already hot jars in? This is our 3rd year and we love it. Have never done the water bath though. We are in the process of boiling down about 60 gallons of sap already here in Indiana.
I’m not sure about that. I use the water bath to sterilize the jars before processing the jars full of syrup, so it is already very hot, close to boiling.
Good stuff Janet!
(Cleveland, OH – Westlake) I am evaporating my first ever batch as I type. It wasn’t until after I started this morning with stock pots on a two-burner 60k BTU camp stove that I found your site. The shallow buffet pans are on my list now as its been several hours and just now getting about ten gallons down to near finishing stage. Gone through about a whole 20lbs of propane also, so that’s not going to cut it.
All we have in our suburban lot are silvers and they are flowing good right now. Ten trees total with 12 taps, 10+ gallons and counting quickly in the past 48hrs. Just thought I’d share what’s happening here!
Thanks for the wonderful article!
Glad it’s helpful, Kevin. I’d love to know what your sap to syrup ratio was, when you’re all done. Have fun and enjoy your liquid gold!
Well right now I’m in the kitchen finishing it and do not have a thermometer handy but it’s looking like about a pint from the 20-24 gallons from my first collection. It is quite delicate in flavor right now but has a freshness to it that I haven’t tasted from syrup before. Quite delicious but amazing how that many gallons all boils down to this!
Scratch that – I believe it was around 20 to 24 QUARTS, not gallons
That’s pretty good – it would be a 40:1 ratio, the same as what you get from sap of sugar maple.
Love the directions you’ve provided for making maple syrup. I was wondering if I could do this process.
Day one: boil the sap thus far collected to the concentrate stage, filter the sap and then refrigerate it.
A day or two later boil more collected sap and filter then just add it to the first batch already in the refrigerator.
Do that a few times until I want to do the finishing boil in the house to the syrup stage.
This is going to be my first year collecting sap, and with the current temps I am going to run into a storage issue for the sap, and will need to boil frequently to avoid spoilage. Thanks for any insight you can provide.
Chris, yes you absolutely can do that, and I have done it that way. Have fun!
Nice article Janet. Growing up in North central WI my Dad always cooked maple syrup. We had about 20 hard maple (sugar maple) and we would hang coffee cans on the trees then dump the sap into old steel milk cans to store. Dad had made a 3′ by 3′ pan about 12″ deep and built a fire box out of brick,and we would keep adding sap as it cooked until we had a few gallons of syrup. Then we would put it in quart mason jars and Mom would hot water bath them to seal. We always finished everything right in the pan outside. Reading this I now know how come ours always had a little smoky flavor compared to stuff we now buy in the store. I loved that Smokey flavor. Well fast forward 30 yrs. Dad and Mom are both gone now but I have two teenage boys and about 2 to 3 acres of a mixture of soft and hard maple trees in the woods we live in. So we built the fire box pretty much the same as you have and we had 2 pans 2′ buy 2′ built. We plan to tap 30 to 40 trees. So far I have around $500 in everything from taps, & barrels, to testers and filters. Sap season should start here in a few weeks and I am so excited to carry on a family tradition with my boys. I have been readying all the info I can because I was a teenager the last time I cooked maple syrup and I guess I wasn’t listening as much as I should have back then. LOL I do have a question for you though. The way you cook outside how many gallons of sap do you cook down in an hour? My plan is I have 3 55 gallon barrels I will fill with sap then start to cook it down. How many hours do you think it will take to cook it down to syrup?
Hi Rick, it takes roughly 4 hours to reduce 10 gallons to 1 gallon. Roughly. On a sunny, breezy, low humidity day it might be a little less. On a still, humid day, it would be longer. Your pans are twice the size of mine, so you can go twice as fast, but with so many gallons you will have to boil over multiple days. I don’t know how long it will take in total, you’d have to do the math, but with all those trees, I’d start boiling as soon as the sap starts to flow. You can pool partially boiled sap and finish later, but you have a huge amount of sap to boil for just 2 2x2ft pans to save all the boiling for the end.
You’re right, when you finish it outside it does have a smoky flavor. I love it too. So fun, isn’t it? It’s great that you are involving your sons. My son used to love maple sugarin’ but he’s 17 now and busy with other things.
i processed 10 gallons last weekend. And ended up with one quart of really good syrup. We processed 50 gallons this weekend and got 5 and a half quarts of nice looking syrup that has such a strong smoke flavor that it is almost not edible. Both were evaporated over a wood fire however obviously the 50 gallons took much longer. Does your evaporator keep the smoke away from the boiling sap? This is my first year tapping trees and am learning a lot, hopefully next year I can keep the smoke out!
Hi Garrett, see the section on Evaporator to read how we reduced the smoky flavor. It’s hard to get rid of that entirely if you’re boiling it off outdoors over fire, but the more you can keep the smoke away from the sap, the less smoky it will taste. To me, a slight smoky flavor is desirable.
The one thing you might want to look at is the kind of wood you are using. For example any type of pine might give a different taste. I do a lot of smoking meat and wood type is the biggest factor in taste, and I would say maple syrup would be the same. We use all hard woods. We don’t even have a chimney on the cooker the smoke just rolls over the top and it tastes great?
Great point, Rick. We don’t mind the smoky flavor either, as long as it’s not too strong. Our fire wood is mostly sugar maple. Our yard is on old farmland with sugar maples lining the road that the old time farmers used to tap. We tap some of them, but others are old and dying now, and our fire wood comes from their fallen branches.
You’ll want to make sure you have a clean firebox that’s free of excess debris and ashes, and get a good hot-burning fire going using well-seasoned and dry wood. Gunky or ash filled firebox leads to more smoke off-flavor, as does wet wood or a lazy fire. Focus on using hardwoods and not things like pine or spruce. I have a 6′ chimney on mine which directs most smoke away. A little smoke does waft around the sides of the pans especially at first, but once the fire is really hot and there’s a bed of coals in there there’s almost no smoke at all.
I find a light smoky flavor to be desirable, however.
This is a wonderful write up. I’ve lived in VT my entire life and my boyfriend and I gave sugaring a try this year. He was up for 14 hours boiling on our homemade barrel stove last night- thinking we had done it all wrong and it wouldn’t come out. I’m finishing it off right now, and was so happy to see a to the point- write up like yours. Simple, but so far without readning anything have done it exactly like you’ve outlined and it’s on the stove inside right now for the finishing boil, as we ran out of wood. Thanks again.
Hi Heidi, glad you enjoyed my article. Enjoy your home made maple syrup!
I have a question in regards to taste. Is it possible to get the smoke flavor out of processed syrup? I have some that has a strong smoke flavor and would like to know if it’s possible to get that flavor out of it?
That, I don’t know, George. Maybe someone else will chime in…
Sometimes the ‘smoke flavor’ can be concentrated in any impurities/char/sugar sand left in the syrup – if that’s the case, filtering can help.
In general, though, there’s no way I know of to remove all of the smoke flavor; prevention is the key (hot fire, dry hardwood, clean firebox scooped free of excess ashes, etc.).
You could try diluting it in a less smoky batch to spread out the flavor, or you could cook with it in some application that makes the smokiness desirable, such as in BBQ or something.
Hi Janet!
Just making our first ever batch of maple syrup! We are ridiculously excited about the whole process!
One question – we have bottled our syrup in 32 ounce mason jars – that’s all we had on hand.
I’ve processed them in boiling water. If I want to split them into smaller jars to share with my friends, can I just sterilize the smaller jars when I pick them up next week and reprocess in a hot water bath again? Thanks for all the great info!
I was just about to reply about this. When you bottle with anything (Glass or plastic) Clean it with regular dish soap throughly. Then pour your syrup into the container at full temp, Cover, and allow it to cool upside down. The heat will steralize the inside of the container. I use plastic bottle form a local supplier. Just a quick rinse and no problems over a year later. (Besides the awful taste from the alumnium pots we used. All SS this year.
Joyce, yes I think that would work fine.
Pingback: Home Made Maple Syrup Part 3 - Competition - Business Unusual
What a wonderful webpage and article. I’ve been reading and researching maple trees until my eyes are tired! But this article was the best. And you inspire me because, although we are supposed to inherit our family’s 8 acre farm, our cousins want it sold. So if the farm doesn’t work out (I so pray it does) then atleast I have your 1 acre site to refer to as I continue growing and nourishing my family with the freshest foods possible on about 1 1/3 acres myself.
My question is, how can I tell what kind of maples I have? I’ve read EVERYTHING and I’m still confused. I guess because I’m trying to figure them out in early March. The leaves all over the ground certainly seem like sugar maple, and I read that the branches must be equal growing, not intermittent so I’ve got that but the bark is so hard to tell!
I have brown sandy colored trees I’ve been tapping that get more grey as the tree grows tall and my thickest tree does appear to have the beginning of the plating I’ve read about. Therefore, I was so sure they were maples but I still don’t know what kind because my trees are not older like all the pics I see. What do the younger trees bark look like? They are more than 12″ but please send me help. When I back up and look at all my trees in my little forest, these trees are lighter in color and stand out right away. These are the ones with maple leaves all around on the ground.
Anyway, the neighbors must think me crazy as I’m always outside looking up at all the trees! Lol.
Thank you and God bless all you do!
Cheri
Hi Cheri, you can send me some photos if you’d like me to help you ID the trees. I’d need good quality pics of the leaves, bark, and buds. Also tell me what color(s) the leaves turn in fall. You can send photos to me at Janet (at) OurOneAcreFarm (dot) com.
I have been making syrup for a few years. I have only six taps out so I don’t have a large amount of sap at any one time. I put my sap in an 18 Qt electric roaster at night and let it cook at high temp while I’m sleeping. This is done in my garage. I will fill next morning and let that cook down half way and then finish off in a steel pot on my turkey fryer. The electric roaster is slow, but I get no excess smoke flavor and I do not need to stoke a fire. It also cooks and I can tend to other maple syrup tasks,etc.
That’s great, David, sounds like it works really well for you!
Hi i have 175 taps so i built a 2 x 6 wood fire evaporator, the problem is i can t get the stainless steel pans to boil so the evaporating part is very poor,can you guys help me find the problem,instead of evaporating 40 liters an hour its only evap. 5 liters
Jean, it’s hard to answer that without seeing your set-up. Is the fire close enough to the pan bottoms? Are you filling the pans too deep?
Most likely, either the pans are filled too deep or the fire isn’t big enough or close enough to the bottom of the pans.
Hey Janet,
Thought I would up date you. We ended up taping 50 trees (mostly soft maple) and so far have cooked out around 15 gallons of syrup. It has been fun remembering how it is done, How the weather effects the running of the sap etc. Had a big lesson this morning as we cooked down around 130 gal. of sap yesterday (Started at 8:00 am and finished at 11:00 pm.) So once we had it done we transferred it to the turkey fryer and stored it over night. I started up the fryer this morning to heat it up to about 200 so we could bottle it. Went outside and checked it it was at 185 so went back in the house for 5 minutes. Came back out and about half had boiled over. That sucked! But it brought back another memory. “When syrup is done it foams up and boils over” Now I remember! LOL I also remember how much everyone loves open fire maple syrup because we have given a lot away. But I enjoy doing that.
Sorry to hear that happened, but yes, it can boil over really quickly! I have had this happen, as well.
Pingback: Water Bath Canning Recipes and Frequently Asked Questions
I just opened a small jelly jar of our syrup and it looks like there is the making of sugar cane crystals or small peices of glass? This one jar is the only one I have seen that it has it in it. This jar also is the produce of my husband (god love him) accidently pushing g the top of the lid down causing it to not have a proper seal? Could anyone tell me what these peices are and if safe could I rebook it down again?
Hello,
If it’s how I’m imagining… these are literally just chunks of sugar. The syrup was too sugary/dense before canning (I have had this happen a few times). On a Brix refractometer, maple syrup has at least 66% solids, up to 67% to 67.5%. Anything above 67.5% means crystals of sugar will form in the container. They are not harmful in any way and you can eat them or ignore them. I would not try to reboil it.
Dear Janet,
We recently purchased a house in VT that had already been set up with blue maple sap collection tubes. My wife and I decided that we’d try making some maple syrup, albeit we had no prior experience doing so. I put in the taps and after about 3 weeks, the 100-gallon holding tank was nearly full and I had to pull the taps early! Anyway, I have a few questions that came to mind during the processing part of making syrup:
1) I noticed that when the sap reaches 219F, the boiling froth actually appears noticeably different. More importantly, I found that when the sap water content is sufficiently boiled off and you’re cooking it just a bit more to bring up the viscosity, you can’t stir it with a wooden spoon because it immediately froths over the side of the pot. I was stupid enough to try it again to see if this was just a glitch. My wooden had spoon appeared to be bone dry, so it didn’t seem to be moisture causing this to happen. I’m clueless. Anyway, after the mess I created, I was afraid to experiment with metal or silicon kitchen implements as an alternative to wood. Any thoughts on this?
2) Our first batch was darker than typical Grade-A VT maple syrup, but you could still see through it easily with a backlight. I also noticed that after allowing it to settle, a very dark 1/2″-3/4″ layer would form at the bottom of the canning jar. This dark layer had no solids in it whatsoever, and the only way I was able to filter it out was to use a paper-type coffee filter. Once I collected this dark stuff from the jars, I tried tasting it and found that it was like maple candy! It had a better maple flavor than the lighter syrup did in my opinion. Do you have any idea what might have caused this denser and darker layer to form in the first place?
3) I noticed your comment about how local environmental conditions can affect the outcome of the syrup. Maybe that would explain why our syrup has been so dark. As noted above, our first batch was darker than expected, but all subsequent batches have been noticeably darker or even black! FYI, we have boiled down all of our maple sap in the kitchen, so smoke is not the reason for this darkness. I will tell you that the bark on a smaller percentage of the trees in our “sugarbush” appears noticeably different than the bark on the majority of the tapped tree’s, which makes me think that the farmer who set this rig up was tapping different species of maple? What’s most important is that even the black versions are delicious, but they appear to be bottles of very dark black coffee, not maple syrup. Do you know of a filter that would make our syrup appear more appealing?
3) The last question I have for you concerns bacteria. I know that the sap is boiled for a long time, but I’m still concerned about how long what remains in our holding tank will last before possibly taking on an unpleasant flavor, and I don’t know if I will need to flush out and sanitize the blue tubes before the next season comes around. Will bacteria affect the taste and finish of the final product?
I would greatly appreciate your thoughts. Thank you, Scott.
Hi Scott,
Not sure I have any definitive answers for you.
1. Yes, it does froth up quickly and impressively when it’s just about done. I use a large enough pot so it can’t go up over the sides. I do not know why that happens, but it is typical.
2. Could you have begun collecting sap a bit too late? When I did that, the sap was yellowish (a sign you should stop tapping), and when I boiled that yellowish sap, I ended up with a double layer of “syrup”, one darker than the other. I do not know what causes that but people usually stop tapping when the sap begins to turn yellow.
3. It’s typical for each subsequent batch to be darker than the last. Always, the lightest, most delicately flavored is the 1st batch of the season. I don’t think you can filter it to lighten the color. The bark on sugar maples changes as the tree ages. On younger trees, it is smoother and sort of a brown-beige color. As the tree ages, it becomes grayer and rougher. An old sugar maple has thick gray bark with many rough scales and furrows. So I suspect the difference in bark appearance you are seeing has to do with the age of the trees. When the trees leaf out you should be able to identify them for certain. Just be aware that Norway maple has leaves very similar to those of sugar maple. You will have to use a field guide to bark, leaves, and twigs to distinguish between sugar maple and Norway maple.
3. Yes, you should clean the tubing after you are done using it this year, and probably right before you use it next year. I don’t use tubing so I don’t know the best way to clean it. Since the sap is boiled for so long, I don’t think bacteria will make the syrup unsafe to eat, but it most likely will affect flavor and color.
Hope that helps.
Janet
1. This is actually how I tell when the syrup is done. I rarely actually measure its temperature anymore since I can tell from the look of the bubbles. They become very fine and clump together, and just when the syrup is done, they begin to rise up in the pan. And yes, stirring can make them rise up even more at that point – I almost never stir my syrup. I skim off any foam only after I have shut the heat off and the bubbles have settled.
2. The material in the layer you speak of is ‘Sugar Sand’ or niter. This is natural mineral content, mostly calcium derived, that precipitated out of the sap during boiling. Even if you filter it out, each time you re-boil, more sugar sand can form. It is harmless, does not hurt the taste of the syrup, and does not harm anything the syrup is used in. However, it can give a slight ‘texture’ to the bottom portion of syrup. It is usually filtered out for aesthetic purposes but I do not do this as I do not find it unpleasant and therefore I believe the step to be unnecessary.
3. USUALLY, the lightest syrup is from the earliest boils. Dark syrup typically comes later in the season, as the sugar content in the sap is lower and requires longer boiling to turn into syrup. However, if a batch of syrup is boiled for a particularly long time as in it had water mixed into it or had more and more sap added to it to keep it going, this too can result in a darker product. Additionally, as you noted, boiling method can affect color – I boil over wood and this automatically makes my syrup a stage or two darker due to it taking a little longer plus the effects of the smoke etc.; when I boiled on natural gas I usually had more than 50-60 percent of my syrup turning out light. I actually much prefer dark so as a result I much prefer wood fire. Regarding your comment about other types of maple, it’s fine to mix the species of maple, and most can be successfully tapped as far as I know. Sugar maple is just the most sugary sap so it takes less to turn into syrup. Different species should not significantly make your syrup darker/lighter, however I have found that I do not prefer the flavor of my Silver Maples’ sap and so I now purposely do not tap them. Filtering – I filter through plain old white sackcloths, which takes out any leftover small debris, tiny pieces of ash or char, etc. but it does NOT remove the sugar sand/niter. If you want to remove all the sugar sand and make a totally clear product, there are several types of commercially available filters.
4. You should notice a change in color or smell of the sap before you’ll have to worry about noticing a change in flavor in the syrup. I have always had a much larger issue with yeasts (fungi) than I have with bacteria. Yeasts ferment the sap, which makes the sap cloudy/whitish, sometimes with the appearance of strings floating in it, and if left too long it will smell alcoholic. I have successfully made syrup out of lightly fermented sap on several occasions. However, if it is too fermented, the finished product will have an off flavor… usually I would say this off flavor for me is ‘fruity’ (but not in a good way). The only time I have had a bacteria issue is at the end of this past season after a very long streak of unseasonably warm weather. The sap in the buckets got a similar cloudy appearance, though the buckets themselves had what appeared to be a light pinkish or reddish film on their surfaces. The sap smelled and tasted mostly alright, so I boiled it. The finished product tasted fine, but it was what is called ‘ROPEY’… when poured or spooned, the syrup comes off in slight sheets/strings. This type of ropiness is minor, serviceable, and I can still use the syrup for myself. However, severe ropiness can result in a product that can be almost gelatin-like! If the temperature of the storage area is cool, sap will last for many days. If it looks clear, smells fresh, and tastes fine, it’s definitely fine to boil. And yes, you absolutely must flush out and sanitize any tubing before the next season.
Also RE: my belief that #2 is sugar sand – my sugar-sandy syrups are generally always quite clear and can easily have a light put through them as well; when it is fresh the sugar sand just appears as a dark or hazy layer at the bottom of the jar. You would most likely not notice the ‘solids’ nature of the sugar sand unless the jar sat for several months and it was fully settled to the bottom, as any texture it has is a very very fine texture in most cases. Also, sugar sand can most definitely be darker in color as opposed to light or white; I usually only have light sugar sand if my syrup is very light also.
I cannot think of anything else that would cause this effect at the moment. Perhaps some other type of impurity I have not seen.
Thanks for all your input. The reason I thought what he was describing was not niter, is because he said there were no solids in that layer. I notice the solid nature of sugar sand within minutes after jarring the syrup. Also, I have only seen it be light in color. Any dark solids in my syrup taste charry, never sweet. Only the whitish solids, in my syrup, taste sweet. I wasn’t sure what he was describing, and thought it sounded like 2 different liquid layers, which is what I get when I boil sap that I collected too late. Not sure – maybe he will come back and clarify.
I am sure sugar sand can vary, too, and especially with such a variable system as mine where the wood I’m using and conditions I’m cooking under are always changing. I don’t usually notice my sugar sand at all until the jars have settled for some time, and surely not at first. It might look a little hazy down there within the first few hours, but if I taste it right away there’s barely anything detectable other than the color change. I’ve also never noticed much of a difference in the flavor of my sugar sand be it darker or lighter in color. However, I am also very preferential toward the dark and slightly smoky stuff, and it’s possible I like or do not notice some things other people would not like or be really put off by!
I would like to see a photo of this 2 layer syrup if you ever make it again as I always like to see what interesting things people come across. Even when I collect very late or even buddy sap I’ve never seen this happen. For me, late sap just turns out weirdly thick/viscous or with a funky ‘chocolatey’ or ‘wet dog’ off flavor and smell.
Another thought I had: if I made one batch of room temperature plain/good syrup, and then mixed it with a batch of room temperature ropey/bacterial syrup, it might be possible for an effect like this to happen. Not sure. I would suspect that if it isn’t sugar sand, though, that it’d have something to do with that – which is kind of what you suggested. I say room temperature because I’m not sure it’d happen if it was hot, I think in that case it’d all just mix and turn a little ropey, but I’ve never tested it so I don’t have all the answers!
I don’t have a photo of the 2 layer syrup. It has happened to me twice, in separate years, and both times I was working with late sap. It was not pooled with any other sap, and it was fresh. I knew the yellowish sap was late and I wanted to see what would happen if I tried to make syrup out of it. I tossed the “syrup” because like I said, it was in 2 separate layers, and it also didn’t taste very good. It has been so long that I don’t remember exactly what it tasted like, so cannot describe it.
Sugar sand is usually easy for me to see shortly after jarring the syrup. First cloudiness, as you say, and then it quickly settles. I have definitely seen those solids when syrup is still quite hot. But back to the guy who asked the question — I am really not sure what he was describing.
Ok. Forst. You collected raw sap for 3 weeks without boiling!?. No good. It goes bad just like milk. You used old tubing?. Not good either. Really you need to visit a neighbor ( sugarmaker). who can help you.
Hi, your post is so very interesting! I’m Italian and I love maple syrup but it is so hard and expensive to find, so I’ll try and do what you described here! I have 2 beautiful Norway maples in our garden, and our climate is really warm, do you think it could work anyway? I mean, sugar maples and red maples aren’t easy to find, Norway type could work anyway? Thank you! ?
I have never tapped norway maple, but have read that maple syrup can be made from its sap. However, the sap is more dilute, and you have to boil off about twice as much water as you do to make syrup from the sap of sugar maple.
Hi Janet,
Thought I would chime in once on the progress we have made in our maple syrup venture. Year one was a ton of fun. We tapped about 50 taps (40 trees) and ended up with around 80 quarts of syrup. I thought we had a great year. So now our “simple little operation” has become a tad more expensive. Over the course of the summer we rebuilt our one man operation. 1) last year we were standing in 1′ of mud the entire spring as our cooker is in the woods by our house. So this summer we put down 200′ of drain tile and then hauled in about 60 yrds of granite. (No more mud) We also put in a fire pit that we have sit at all the time now in the woods. 2) We rebuilt our entire fire box. My sons and I bag mixed and poured a 2′ by 4′ 6″ slab. Then we built a 2′ high fire box with 2 side doors and a 7′ chimney. We added the chimney so smoke would not get in our face as much. We also decided to build the chimney out of brick instead of a metal one so it would last. A lot more work but it turned out excellent. Then we had an old play house 8′ by 8′ (I had built for the boys 10 yrs ago)the boys and I redid the entire thing. We put T&G on the inside built some cupboards, added two more big windows resided it moved it leveled it and ran electricity to it. It also has a refrigerator now. A lot of work but what a cool thing to do with my two sons. And I made sure we did it together. 3) here was the thing I didn’t plan for. Once we had the fire box built out of brick I starting reading up on it. Turns out brick won’t withstand the heat. So now I had to line the entire inside (including the floor of the cooker with fire brick. That was quite expensive. Around $500 as you also have to use a special mortar which is crazy expensive. We plan to tap 100 trees this year because we have a lot of family that likes maple syrup as much as we do. My cousin and brother have each brought us a load of hard wood fire wood already split and My uncle was here almost every day helping with the work we did. so I guess they like Maple syrup too LOL. When I came up with this crazy idea to make maple syrup my wife thought I was nuts. Now she will honestly tell you this was the best thing we have done in years. Our boys are learning how to do this, our whole family is involved and we are having a blast. I never would have thought 30 yrs ago that my Dad was teaching me something that would become so valuable in my life someday. There is no way I could recommend something like this enough to anyone that reads your page. From my own experiences as a child I know I am teaching my boys something they will someday carry on with there family.
What a great story, Rick, thanks for sharing!! Maple sugaring and everything that goes along with it, IS a great experience for kids.
I live in Washington State. No one here that I know taps trees. I got motivated and a friend and I tapped 6 Large Leaf Maple trees. These are old growth trees and one is 27 feet around. In the 3 weeks we’ve had the trees tapped we encountered what I call Happy Sappy weather and now have 30 gallons of Sap stored. We plan to cook this Sunday. Two questions I have:
1) how do you know when to call the syrup done and ready for final cooking to 7 degrees above water boiling temp?
2) Do you know the ratio of Syrup I will get? I’m guessing maybe less than the 40-1 ratio.
Ok 3 questions:
3). Does Large Leaf Maple Sap produce good tasting Syrup?
Hi Ken, I’ve never tapped large leaf maple, so I’m not sure how well it will work, or what ratio you’ll get. I don’t understand your question about done-ness. Getting it to exactly 7 degrees above boiling point of water is not essential. If you don’t mind a thinner syrup, you can stop sooner. But do use a thermometer so you’ll know when you’re getting close to 7 above.
It’s my second year to make syrup and I have 2 questions.
First one is about the flavor. I have two big trees on by back acre. The flavor is more like butterscotch than maple. Why would that happen ?
Secon I have one small batch that didn’t get filtered and has a lot of black specks in it. Annyny health concerns with putting it in my coffee??
As each season begins and ends the flavor will change. Also the lication of the trees and the soil. Maple can have many flavors. The black specks. Yuck. Filter them out next time
how can i prevent sugarsand, other than filtering (no luck) 2 batches.
how about filtering at a lower temp, other than 219 deg.
say maybe 190 or less.
I find that I can’t prevent the sugar sand. I filter it once or twice through a coffee filter well below 200 degrees, but it doesn’t prevent the sand.
What I have started to do is bottle the syrup, and if it settles nicely, then the next day I re-bottle it by pouring off the clear syrup into a fresh jar
and leaving the cloudy syrup and sand in the other bottle. I use that cloudy syrup at home, and give away the clear syrup.
I haven’t figured out how to properly preserve that re-bottled clear syrup. I boil the jars and lids before bottling, but not afterwards. Others on this site have suggested turning the hot filled jar upside-down or boiling the filled jars. I am very afraid of leakage!!!
Wonderful article! We also have a small operation which is 3 hours north of where we live. We have a similar set up but find that the blocks keep cracking from the heat, also we set our pans on the top of the blocks for easier removal. We have not found smoke to be a problem. This year we filtered thru a t-shirt then brought the sap home to finish off.
We are in our second year of maple sugaring. It is a fun winter hobby!!! I live in Northern NJ and this year we have tapped 3 trees. I couldn’t tell this summer what kind of maple from the leaves, but I know that they are not Norway maples. They are possibly sugar maples or silver maples based on my location. I have compared the summer and fall leaves in a book, but couldn’t identify them.
I cook exclusively indoors 2 or 3 times a week, and my ratio is close to 40-to-1. My batches are generally 3 to 5 gallons of sap. This cooks up to 9 to 15 oz of syrup at a time.
My question for anyone:
How do I know when the syrup is really DONE?
I have tried using a candy thermometer, but it doesn’t reach beyond about 210 to 213 degrees. The length of the thermometer cools as the level of syrup in the pot lowers. In fact, the temperature will drop instead of rise. If I use a smaller pot, then the syrup foams up and comes too close to the top.
I have experience making candy from my childhood, so I know to watch for a change in the bubbling and foaming. I have stopped cooking when it looks syrupy, but it is always a little thinner than I would like. I use a spoon to catch the syrup and watch it drip. Not the most reliable, but certainly effective for my purposes.
Is there any other way to tell when it is done?
Thanks so much for any advice you could offer.
You can buy a tester online for about 20 to 30 bucks. they work really well and take out the guess work. Otherwise if you take a spoon and and tip the syrup off it will be stringy when it is done. Be careful because it will burn and boil over very quickly when it is close to being done.
I am currently boiling my sap down, is it ok to put a hold the boiling, if it doesn’t reach the syrup stage before I am ready to go to bed? Or do I have to finish the entire process in one sitting? Thx. Great article btw!
I always let my cooker go out at night and then start it back up the next day. So you should not have a problem. Just make sure it doesn’t cook out or you will burn it.
Hi Janet! I want to thank you so much for your post and obvious love for your land. I used this information, along with my local UNH Co-op Extn info and have to say that yours provided the much needed details including the “what if’s”. You’re my go-to now! I recently bought a 1700’s colonial w/2 acres in NH and have been trying to lay out my long-term goals for the property. Would love to see how you’re utilizing yours as it seems you’ve quite a variety of consumables.
We’ve tapped ten trees and have thus far (<2 wks in) collected 50 gallons. My first batch of maple syrup yielded almost 40:1. What a sense of pride and accomplishment this brings! Simply being able to share with family, friends and neighbors – and see the look on their faces – is a feeling that's hard to put into words. I can honestly say that your willingness to impart your knowledge and expertise has given many of us the courage to try this ourselves. I'm already looking into expanding our little operation next year!
Jar Option – Resource in Minneapolis
Great blog, thank you all for sharing. Update for the Minneapolis metro area. We are running well, currently 30 gallons last Monday-Tuesday out of 6 taps, and another 15 gallons waiting to be collected after morning coffee. Next weeks forecast looks great too. I thought I would offer another choice to water bath canning. I was looking for a fancier jar and tried a commercial plastic cap with a foam seal on a 12 oz oval jar, identical jar to higher end syrup you would find in a glass jar at the grocery store. I do sterilize and keep them in the oven at 180 before filling. After filling simply screw on the cap and lay the bottle on its side till cool. Done! And very attractive. I just bought (36) 12 oz jars and caps yesterday for $33. The company is packaging concepts on glenwood ave. They were very friendly too. a plus as they seem to cater to larger commercial accounts. Obviously there are many online options but nice to know a local source if you are in the area. All the best!
How do you know when it’s done?
Ginger,
a guide I use is 7 degrees above the boiling point of the raw sap, which works out to 219 degrees F. Too hot and you will get hard maple candy. I have jars that have some hard candy in.
Jim
Hi,
We have been making maple syrup for about 5 years now. We tap about 500 trees. We cooked down our first batch this year which we cook all the way down to syrup in our outside pans and then bring it inside to reheat and bottle on the stove. A new problem we ran into with this first batch is that when finished and we ran tried to run it through our pre-filters and then our heavier orlon filters into milk cans, the syrup did not filter. It just sat in the filters. We never had this happen before, although it has filtered slower at the end of the season. Do you think this could have happened because the temperature outside was so cold? It was only about 15 degrees out. What we ended up doing was leaving the filters full of syrup hanging the the milk cans and moving them into a garage to let them finish filtering. Hopefully, it will eventually filter through and then we will reheat it to bottle it and hopefully not get a lot of sugar sand. Any ideas as to why it didn’t want to run through the filters? Thank you!
These articles (and the website in general) have been priceless in helping us to understand and get started in maple syrup production. Just a quick note at how we support our 8 qt orlon filter cone. We just take a large, four wire tomato cage and turn it upside down. The loops of the filter cone go over the four wires that would normally go onto the ground. The larger tomato cages will work nicely with a five gallon pail – big enough to fit over the pail and high enough to clear it. Although we filter the syrup we intend to give away, we also keep the unfiltered remainder for personal use – nothing goes to waste.
Somehow I found you blog. Am impressed with how simple your approach is. Have canned quite a bit in my past, from jams, fruitsoreads, veggies and sauces.
I too just went into the process and developed a stove from parts I had around my shed.
I guess having some fire bricks help concentrate the heat without cracking the cinder blocks.
I have found that trying to cook too much sap in one day, may darken the finished product. Also, the early stage of sap season usually has lighter syrup. And that the warmer it gets, the bacteria grows and darkest the finished product.
I’m going to try making my cooker a bit larger for more surface area to boil faster. Will see. I don’t want to invest too much $ for this. I guess I’m cheep.
Anyhow, my family, friends and my partner love the syrup.
Thanks for sharing your experiences.
Do a Google search for ” oil drum syrup fire arch” and you will see many affordable options for a cooker….the main things are to not heat the pan up the sides which will char at surface line. And to minimize the fire box and keep the flame directed at the pan between fire box and smoke stack, with a good draft coming from below the door. Horizontal surfaces in stove can steel roofing with 2″ of for insulation to save on brick. Red brick can be used if you build it to be easily replaced as needed, red brick can often be found for free when chimneys or brick buildings are demolished… your stove needn’t cost you a dime, two tanks be ran end to end for larger pans.
2″ of sand for horizontal insulation
Your info is good. I do have some tips to help resolve some of your and your readers issues…
I’ve been around syrup cooking for about 30yrs, not big operations but not this small either. We generally cook off between 15-20 gallons per batch, but in principle we do it closer to your method.
1- first your cooker, cement block don’t cope with direct heat. Line the fire box with brick (fire preferably, but red clay will do). If you bring the brick up to the bottom of the pan it will insulate the sides of pan to eliminate the charing(use 2 back to back pieces of angle steel between pans across the brick). This will also retain heat better.
The opening in front should have a way controlling the draft for a more intense fire. An old wood furnace face can be repurposed for it, or just a piece of tin. If you raise the cooker up one course of block you can put a cast iron grate in so the draft comes from below.
2- If you place your cold sap in large stock pots (22-31qt) on the back corners of the stove near the pipe it will preheat it. Then transfer it to rear pan by making a siphon from 1/8″ copper tubing. Bend the tubing in a U-shape with one leg to the bottom of the stock pot the other down into rear pan (out flow must be longer than intake). The goal is to not kill the boil when adding sap. You may need to experiment with flow to have the siphon keep pace with evaporation by crimping an end(I had 1/8, 1/4, and 3/8″…but my pan is 76″x27″). Start the siphon by simply submerging in cold sap letting air out, then place finger over output end, dip in intake end in stock pot and release. Have another siphon between pans started before the heat, this will self level and force half reduced boiling sap onto front pan. This is the same principle a large evaporator uses to increase efficiency. I’d wait to start stock pot siphon until it’s needed in pans.
A 55 gallon barrel cut length wise in half can serve you as a hood. Position the open end towards warming pots. This will trap heat and direct steam at preheat pots, the condensation should run into the cement block centers. Plus it’ll keep debris out of pan.
3- When you finish a batch strain through a kitchen cloth, and let stand for a few days. Then pour off the clear syrup on top very slowly til a hint of sugar sand comes up. We settle it in 10-15 gal cans, you could use a large tapered glass pitcher. Now you have a choice. Pour it as is into jars and either use or freeze. Or reheat on stove to 185 degrees filter through orlon sock into urn style coffee pot without perk tube. When the pot hits temp, light comes on and it’s ready for bottling( I cook off at 31.5 on hydrometer instead of 32 so I have a safety margin ) . While you are doing this have your jar lids boiling in water on stove. The settlings you could try to filter or toss or use on your ice cream, pan fish, rice Krispys, ham, or whatever else you want, I just don’t believe letting people who don’t know any better see it (one bad experience can make an outspoken critic of home cooked and someday increased regulations)
My family regards my sealing jars as a ridiculously piontless endeavor as freezing keeps it fresh indefinitely without the risk of making more sugar sands or darkening. I just thawed 10 gallons of 17 yr old stuff and it was still great. Sealing just gives me and anyone outside the family peace of mind, though I generally bottle for myself and sell the rest in bulk to large producers.
All the principles I outlined all are cheaply scalable to a 400-500 tap level operation. However, beyond that a significant financial investment is usually required(vacuum lines, flue pan arch, ro, filter press…). If you implement the suggestions I made you should be able to cut cook time in half. My 76×27 pan is 10-15 gal/hr…my uncle’s 107×34 with hood is 30ish an hr.
Oh, and roasting hot dogs that way, you’re missing out. ..use half cooked sap to boil them in a separate pot…perferated bratwurst are even better. ..they’re all we ate in my shack.
hello,
Thank you for all of the fantastic information. I was wondering how long you can store the partially boiled sap in the refrigerator prior to finishing on the stovetop? I have read that the “Raw” sap needs to be boiled within 7 days, however, is the same rule remain true once it has been boiled just prior to the point of being finished on the stovetop?
Thank you for your advice!
Hi,
I asked a question above but didn’t receive an answer yet about if anyone had any ideas why our syrup wouldn’t filter this year. It happened with almost every batch, where we cook it all the way down to syrup in our big outdoor pan and then tried to run it through pre-filters and then an orlon filter into a milk can to be reheated and bottled inside the house. It took forever to filter this year. Sometimes it sat in the filter for days before it would run through or we had to reheat the unfiltered stuff and try to filter it again. A lot of extra work. Any ideas?
Then another problem we had, which might be related to why it was so hard to filter: some of our bottled syrup ended up having a very fine layer of light brown sediment on the bottom of the bottles. (Our syrup is usually pretty dark.) I’ve seen the crystallized “sugar sand” on the bottom of the jars before, but those were more like clear white little pieces – this stuff is very fine and looks light brown. When flipping the bottles right side up after sealing, some had like a slimy white-ish ribbon floating slowly to the bottom. Could this all be a different form of “sugar sand” or something else?
Thanks for any help!
I have generally waited to filter my syrup just prior to putting it in jars. Also, I never water-bath my jars after they are filled. I fill the jars with hot syrup, to about 1/4 inch headspace, add the lid and ring, then invert the jar for five minutes or so. Then I set the jars upright and wait for them to seal (very few do not seal). I keep the sealed jars in my basement, which is cool and dark, and they last well over a year this way.
All my initial boiling is done outdoors over a wood fire. I finish the syrup on a LP patio stove in my garage. I use a 30 cup percolator (basket removed, of course) to keep syrup hot while filling jars or waiting for more syrup.
Just a backyard operation, but last year I managed to can about 25 pints of syrup.
Boiling point here is 212. So, pour it into jars at 219, and then put the jars in boiling water for an additional ten? Will the processing for 10 extra minutes over cook it, or am I reading your instructions incorrectly, and everything will be fine?
Thank you
For me too same issue, coffee filter doesn’t work, I use me she reusable coffee filter to filter before the syrop turns too thick otherwise it will take forever to go through.
Is anybody else already making syrup in 2018 besides me? I am in northeast Ohio.
I have the last of 25 gallons of sap boiling down on my woodstove right now. I first got sap on January 22nd.
I live in Big Bear Lake California. It’s at 6700 feet, and snows during the winter. I have 5 or 6 maple trees, not sugar maples. I thought I would try to tap the 4 8 to 10 inch trees and got some buckets and ordered the plastic taps. It got warm early this year and I noticed the wet look on some of the trees and decided now was the time to try. I read as much as I could online and proceeded to drill holes. I barely got the drill bit out, and they were flowing. In 2 1/2 days I had 8 gallons of sap and purchased a 3 inch high broiling pan that fit into my built in BBQ. Refilling as needed and proceeded to boil down to about 30 oz. Then took it inside to finish. Low and behold I got about 18 oz of amber syrup that tasted great. 2 days later, I was Boiling again. It is a very light amber, but still taste great. I will keep going with the say until I see a color change. Total investment, $48 including a $10 Book. I am hooked.
Janet, you have done a good deed posting your site, it has been a real treat to read the enthusiasm for maple sugaring. I tapped trees as a boy in Vt on the farm. My brother and sisters boiled sap in a milk can in the woods, then my grandmother would finish at our home. Since we cooked very little sap in comparison to most who have contributed here, I would like to know how I can provide assistance to a community organic farm in my area that has mentioned they have difficulty cleaning the sugar sand that sticks to the pan after the boiling is finished. I had the opportunity to speak briefly with a knowledgeable owner of a sugar house who said that he cleans his pans after every cook, but I did not get information as to the amount of sap or the number of days in each “cook”. I believe the community farm has two pans, one 2×2 and a larger one? (Not sure the size). I would appreciate some additional knowledge so I can help this community farm. Thank you so much!
Two good forums to check. Mapletrader and Sugarbushinfo. Cornell and state maple associations. Please everyone! Use food grade buckets and keep everything clean!. This is a food product. Very concerned about some of the instructions I read here. We had a small maple operation on our farm. If you’re giving syrup away remember when you boil,you concentrate all impurities. Get professional advice before attempting this. One person telling someone else misinformation is not helpful. I see no mention of using food grade de for filtering. This is a great help. Cornell has books that are a huge help. Sign up to go on tours through
your maple associations. Seminars are available at producers and your co op. Do some good research before you get started. This is a great activity for families. Just keep it safe
Debbie,
I have the same filtering problem, and offer my experience from a one-tree operation that may permit a microscopic view of what is going on, from which you might draw some conclusions for your (Wow! Awesome) 500-tree operation.
First I will give some details that other readers might find useful.
I have a single, three trunk, silver maple tree which makes pretty darned good tasting maple syrup. Silver maple is easy to identify in the summer from the silvery cast which the undersides of the leaves bear. In 40+ years of observations, I have always observed its autumn leaves turn a consistent yellow, not unlike mustard. In late autumn, in my neighborhood mix of very many species of trees, it is always one of the last to shed its leaves, just before the nearby mulberry tree, which is always last, unless there is an early hard freeze, which causes the mulberry to lose all its leaves overnight, even if still greet. On a mature tree like my silver maple (at least 75 years old), the bark is a medium to light grey, that cracks into long vertical strips that can easily be peeled off to reveal a brownish underlay of newer bark. (See how much there is to learn from living long and watching?).
Each trunk of my maple tree is well over 12 inches in diameter; so I drill four taps. Some run faster than others, typically on the sunny side. I collect into two 1 gallon plastic milk jugs with a hole cut into each to hang onto an old style steel tap, and another hole to receive, via plastic tubing, from a second tap. On a good-weather day, I can collect a gallon in two hours, but more typical is four, five, or more hours. I don’t cook outside, because the first time I tried this years ago, I did, using hardwood in a large barbecue, and I did not like the smokey taste—I want maple flavor! I cook inside on the kitchen stove in a two gallon steel pot. If the sap is really running, maybe a second pot. Since I have no place to put large quantities of fresh sap, I cook all day while sap is running, which means I replenish the boiling sap whenever the milk jugs begin to fill up. So I have no idea how many total gallons of sap I collect, but guessing from the 3-4 quarts of syrup I got last year, and a typical concentration ratio of 40:1 I suppose it is somewhere around 40 gallons for a season from one tree. I never bother about “killing the boil.” I just pore whatever fresh sap I get into the boiling pot with whatever I have already begun condensing, and then turn back up the heat to bring it all back up to a hard boil, before reducing the flame to whatever will keep it steaming—not necessarily boiling. If the sap slows down or stops, due to warm weather, before I have enough to justify starting the bottling phase, I store the pot in the fridge until the sap starts to run again when it gets cold at night and the sap starts again. I use a candy thermometer to get to exactly 219 F (I live near sea level), which is just over 104 C, and easier to read on any thermometer. My syrup—even from the first run of the season—has been pretty dark amber. This year, almost as dark as molasses, unless you hold it up to a light source. Maybe the above processes have something to do with the color I get.
Now for the filtering issues:
During the boiling, I have noticed that when the liquid is dense enough to produce a pretty good amber color, I begin to see a fine residue collecting at the bottom of the pot, which looks as if it consists of a very finely ground powder of some king. If I didn’t know better, I would have guessed it was like the finest wood sanding dust. That is what I figure I am filtering out, as everything above it is clear and syrupy looking.
I just finished bottling my first batch of this season. (Well, actually, my second, as I forgot about my first, when it was boiling on the stove, and I accidentally made maple candy—luckily I caught it boiling over in froth, probably about five minutes short of burning! Good, though). Yesterday the weather got warm, not freezing overnight, and the sap did not start running today. It won’t get cold again for a few days. Since I had about half a gallon in the fridge, I decided to finish the condensing of this batch, and bottle it.
In order not to have to filter a huge volume of sap through a piece of cloth set into an ordinary kitchen sieve made of metal mesh like a window screen, I filter after most of the boiling is done, and just before doing the final condensing down to the 219 F boiling point.
Last year (my first effort at a “large” quantity producing a few quarts), I had the same problem you describe. The syrup just sat in the filter, and did not seem to want to go through. I just let it sit for long periods, replenishing as it slowly trickled through. I also tried moving the cloth, within the sieve, to a clean corner of the cloth.
This year I made more careful observations. I noticed that, at the start, the syrup began flowing through the filter at a fairly quick rate that was, while not like running water, still quite satisfactory. But it did not take long before the filter seemed to clog up, and slow down the filtering to a trickle. Again, I moved the cloth within the sieve to a clean corner, and the flow increased. I saw the whitish “muck” clogging the cloth, and while it was not that much, it was very dense.
For filters, I use ordinary men’s white cotton handkerchiefs. (Washed first!). Maybe that is my (filtering) problem. After using the entire hanky and clogging that up, I had to use a second one before reaching the end of my half gallon of liquid, and even had to wait a long time for the last of that.
All that, just to get about a quart and a third of syrup.
I figure it’s all about the size of the particles that the filtering material will screen out. The sieve alone would let through just about everything; maybe coffee filters would let through larger sized particles than my hankies do, and go faster, or not clog at all. But I would get clearer syrup.
Bottom line: I think it’s your filter, and I would try different ones to find the right combination of clearness and speed.
Incidentally, my wife says I must have burned $50.00 of natural gas to get a quart of maple syrup worth $25.
I have never seen anybody else do this in suburban Chicago in my entire long life. All the neighbors seem to get all excited about it, and all the kids probably think I’m nuts. Or pretty neat.
I just think the neighborhood ought to have an old man who makes maple syrup. Oh: Yeah, and I love the taste of buckwheat pancakes covered in blueberries (ain-t that grand: you can get fresh blueberries in February!)all swimming in maple syrup.
I have too much time on my hands.
Debbie,
I have the same filtering problem, and offer my experience from a one-tree operation that may permit a microscopic view of what is going on, from which you might draw some conclusions for your (Wow! Awesome) 500-tree operation.
First I will give some details that other readers might find useful.
I have a single, three trunk, silver maple tree which makes pretty darned good tasting maple syrup. Silver maple is easy to identify in the summer from the silvery cast which the undersides of the leaves bear. In 40+ years of observations, I have always observed its autumn leaves turn a consistent yellow, not unlike mustard. In late autumn, in my neighborhood mix of very many species of trees, it is always one of the last to shed its leaves, just before the nearby mulberry tree, which is always last, unless there is an early hard freeze, which causes the mulberry to lose all its leaves overnight, even if still green. On a mature tree like my silver maple (at least 75 years old), the bark is a medium to light grey, that cracks into long vertical strips that can easily be peeled off to reveal a brownish underlay of newer bark. (See how much there is to learn from living long and watching?).
Each trunk of my maple tree is well over 12 inches in diameter; so I drill four taps. Some run faster than others, typically on the sunny side. I collect into two 1 gallon plastic milk jugs with a hole cut into each to hang onto an old style steel tap, and another hole to receive, via plastic tubing, from a second tap. On a good-weather day, I can collect a gallon in two hours, but more typical is four, five, or more hours. I don’t cook outside, because the first time I tried this years ago, I did, using hardwood in a large barbecue, and I did not like the smokey taste—I want maple flavor! I cook inside on the kitchen stove in a two gallon steel pot. If the sap is really running, maybe a second pot. Since I have no place to put large quantities of fresh sap, I cook all day while sap is running, which means I replenish the boiling sap whenever the milk jugs begin to fill up. So I have no idea how many total gallons of sap I collect, but guessing from the 3-4 quarts of syrup I got last year, and a typical concentration ratio of 40:1 I suppose it is somewhere around 40 gallons for a season from one tree. I never bother about “killing the boil.” I just pore whatever fresh sap I get into the boiling pot with whatever I have already begun condensing, and then turn back up the heat to bring it all back up to a hard boil, before reducing the flame to whatever will keep it steaming—not necessarily boiling. If the sap slows down or stops, due to warm weather, before I have enough to justify starting the bottling phase, I store the pot in the fridge until the sap starts to run again when it gets cold at night and the sap starts again. I use a candy thermometer to get to exactly 219 F (I live near sea level), which is just over 104 C, and easier to read on any thermometer. My syrup—even from the first run of the season—has been pretty dark amber. This year, almost as dark as molasses, unless you hold it up to a light source. Maybe the above processes have something to do with the color I get.
Now for the filtering issues:
During the boiling, I have noticed that when the liquid is dense enough to produce a pretty good amber color, I begin to see a fine residue collecting at the bottom of the pot, which looks as if it consists of a very finely ground powder of some kind. If I didn’t know better, I would have guessed it was like the finest wood sanding dust. That is what I figure I am filtering out, as everything above it is clear and syrupy looking.
I just finished bottling my first batch of this season. (Well, actually, my second, as I forgot about my first, when it was boiling on the stove, and I accidentally made maple candy—luckily I caught it boiling over in froth, probably about five minutes short of burning! Good, though). Yesterday the weather got warm, not freezing overnight, and the sap did not start running today. It won’t get cold again for a few days. Since I had about half a gallon in the fridge, I decided to finish the condensing of this batch, and bottle it.
In order not to have to filter a huge volume of sap through a piece of cloth set into an ordinary kitchen sieve made of metal mesh like a window screen, I filter after most of the boiling is done, and just before doing the final condensing down to the 219 F boiling point.
Last year (my first effort at a “large” quantity producing a few quarts), I had the same problem you describe. The syrup just sat in the filter, and did not seem to want to go through. I just let it sit for long periods, replenishing as it slowly trickled through. I also tried moving the cloth, within the sieve, to a clean corner of the cloth.
This year I made more careful observations. I noticed that, at the start, the syrup began flowing through the filter at a fairly quick rate that was, while not like running water, still quite satisfactory. But it did not take long before the filter seemed to clog up, and slow down the filtering to a trickle. Again, I moved the cloth within the sieve to a clean corner, and the flow increased. I saw the whitish “muck” clogging the cloth, and while it was not that much, it was very dense.
For filters, I use ordinary men’s white cotton handkerchiefs. (Washed first!). Maybe that is my (filtering) problem. After using the entire hanky and clogging that up, I had to use a second one before reaching the end of my half gallon of liquid, and even had to wait a long time for the last of that.
All that, just to get about a quart and a third of syrup.
I figure it’s all about the size of the particles that the filtering material will screen out. The sieve alone would let through just about everything; maybe coffee filters would let through larger sized particles than my hankies do, and go faster, or not clog at all. But I would get clearer syrup.
Bottom line: I think it’s your filter, and I would try different ones to find the right combination of clearness and speed.
Incidentally, my wife says I must have burned $50.00 of natural gas to get a quart of maple syrup worth $25.
I have never seen anybody else do this in suburban Chicago in my entire long life. All the neighbors seem to get all excited about it, and all the kids probably think I’m nuts. Or pretty neat.
I just think the neighborhood ought to have an old man who makes maple syrup. Oh: Yeah, and I love the taste of buckwheat pancakes covered in blueberries (ain’t that grand: you can get fresh blueberries in February!), all swimming in maple syrup.
I have too much time on my hands.
First time doing maple syrup. One issue I have is after putting in 10 taps I have gotten only 3 1/2 gallons of sap that was 3 days ago. Ideally I want to store collected sap for seven or so days. Packed in snow and dark then get enough to boil. The temps are 32 degrees give or take. No one seems to have a for sure storage life time on sap … some people say boil in first day or two or you’re going to get sick and die and the flavor will be terrible. Others say similar wish washy stuff. If it is so important how come I can’t get a for sure straight answer ?
I don’t know that anyone has studied the impact of letting the sap sit for different periods of time and under different conditions to say for certain what the impact on healthfulness and flavor will be in your specific conditions. What virtually all sources seem to say, however, is that the longer it sits and the higher the storage temperature, the greater the growth of micro-organisms. That will increase off flavors and health risk. Throw into this the type of storage container you use. Storage for longer in a non-food grade container will increase the chance of impurities leaching from the container into the sap.
As an example, our friends used to store the sap in regular plastic trash cans for several weeks before boiling, at whatever the outdoor temperature was. They never got sick from the syrup, as far as I know, but admitted that it tasted really funny – not like any maple syrup they’d ever bought.
I was wondering why I have so much sugar in the bottom of my jars the longer it sits the more I get I do the ten gallon to one quart
if the sap freezes do you throw the ice away or does it pay to boil it
So sorry I seem dense, I don’t understand the 217 degree point. Is it when I stop outdoor boil or for finishing indoors before canning? If for canning indoors, how do I know outdoor boil end point? Thank you for this fabulous blog of info. First year northern Ohio
I’ve loved reading through all the posts here, hoping someone has some insight into syrup flavor. I have several large sugar maples, (80-120 years old I’m estimating) that I’ve tapped. Every year the syrup ends up tasting like hazelnut instead of maple. It’s quite good, just not maple and my son won’t use it. So unfortunately, I still have to buy Hungry Jack at the store!
I use a cement block/buffet pan type evaporator, but I just tried a test batch using a stainless pan and natural gas burner and get the same result. The only thing I can think of is there is a large butternut tree in close proximity to the maples that might be influencing the flavor.
Anyone have a opinion on this?
Pingback: How to Tap Your Own Maple Trees to Make Maple Syrup | The View from Great Island
My husband and I built and lived on our off grid farm for 20 years. Sadly had to move to a small rural village. Our hearts are broken.I am now trying to transform pur small space to a wildlife habitat and orchard. 4 apple trees went in this Spring and are dpung great. Lots of hiding places for small animals and plants for butterflies and birds. (This past winter I put out cracked corn for the rabbits,squirels and skunks. They need help during the winter. My husband tapped the 3 trees in the front yard. Please consider the new smaller spouts. They do less damage to the trees. We had a 15 acre sugarbush at our farm and produced for sale. From 6 taps he made 2 gallons of light syrup. Our farm trees made rich beautiful golden syrup. My husband boils on a propane fish fryer in the garage. We finish on the kitchen stove. Try to use all stainless steel. No off flavors and the most sanitary. Using canning jars is the cheapest way to go. After checking density(if not boiled properly it will ferment) put into jars and turn then upside down. This sterilizes. No need to do a water bath. You’re just making more work and each time you heat it the flavor changes. Spend the few dollars on a synthetic filter. You will get better results. If your outdoor pan evaporator doesn’t get the smoke away,your syrup will have a strong smoke flavor and smell. Once you do this a couple of times,it becomes very relaxing and easy. We hosted many open housees over the years to demonstrate homesteading on an off grid farm. Everyone needs to start learning basic skills again
Pingback: Backyard Tree Tapping for Syrup | Homespun Seasonal Living
I have a large maple in my back yard and it never really occurred to me to tap it in the past 18 years I have lived here. It is a quite large tree and would like to give tapping a try this year. My resources are limited and do see that I can get taps relatively inexpensive online and I can utilize a water jug and clean bucket. My only concern comes in the cooking process. I don’t want to invest a lot money in something that I may not continue but do want to give it a honest effort. Could you use electric roasting pans outside? I have those on hand. If so, how long do you boil it and how do you know when it is ready for canning?
How thick is you syrup?
Wow! I made an identical cement block/pan evaporator without seeing one before. My sister has a drum style with large custom pan. I couldn’t afford that so the block/pan and Stove pipe works great!!
How do you clean the burnt sugar off the pans, nothing seems to work.
We’ve been making maple syrup for five years now. This batch, 6-pints on Feb. 22, 2020, has a cloud like gel floating at the top of the jar. Never had this happen before. We filtered at least 4-times. It is still there. What is it?
Thank you
I can send a pic if necessary.
Thank you so much for all of the valuable information. I made my fast batchh of maple syrup today before reading all these great comments. I did research other sites but found yours to be excellent with so many enthusiasts adding comments. Overall it went pretty well. I was showing my 5 and 8 year old grandchildren the process of tapping and evaporating as a home school project. However I was surprised with the overall ratio. I started with about 5 gallons which yielded less that a quart of real tasty syrup. I am not sure of the sugar content but it did not crysalize. The final boil went smooth using two pans with a half gallon for the final process. My question is that I was not sure how long to boil the sap outside. Should five gallons be reduce to 2 gallons or one gallon before doing the final boil. When you keep adding more sap, I am not sure the optimum time to do the final boil. Is it by temperature, color, viscosity, or by ratio. It turned to a brownish color in the the first three hours boiling at about 213 degrees but I continued to boil it down to about a half gallon to a gallon with an intial amount of 5 to 6 gallons. What do you suggest the next the next time.
Thank you kindly in a big way from a small state of RI
Sorry about all grammatical errors with my previous post. It was an exhausting but rewarding day making my first batch. I should have proof read it. 🙂
Thanks again.
Pingback: 15 Best Homemade Maple Syrup Recipes - Its Overflowing