
How to Make Maple Syrup I: Choosing Trees and Getting Sap

Maple sugaring is an interesting and gratifying adventure in wildcrafting that can be fun for the whole family. I love the science of sap and syrup, my son in particular enjoys collecting the sap and managing the fire (more on that in my next post), and we all enjoy consuming the final product. In this first part I’ll cover choosing the trees, tapping them, and collecting the sap. If you would like to jump to Part II, boiling, filtering, canning and quality, go here.
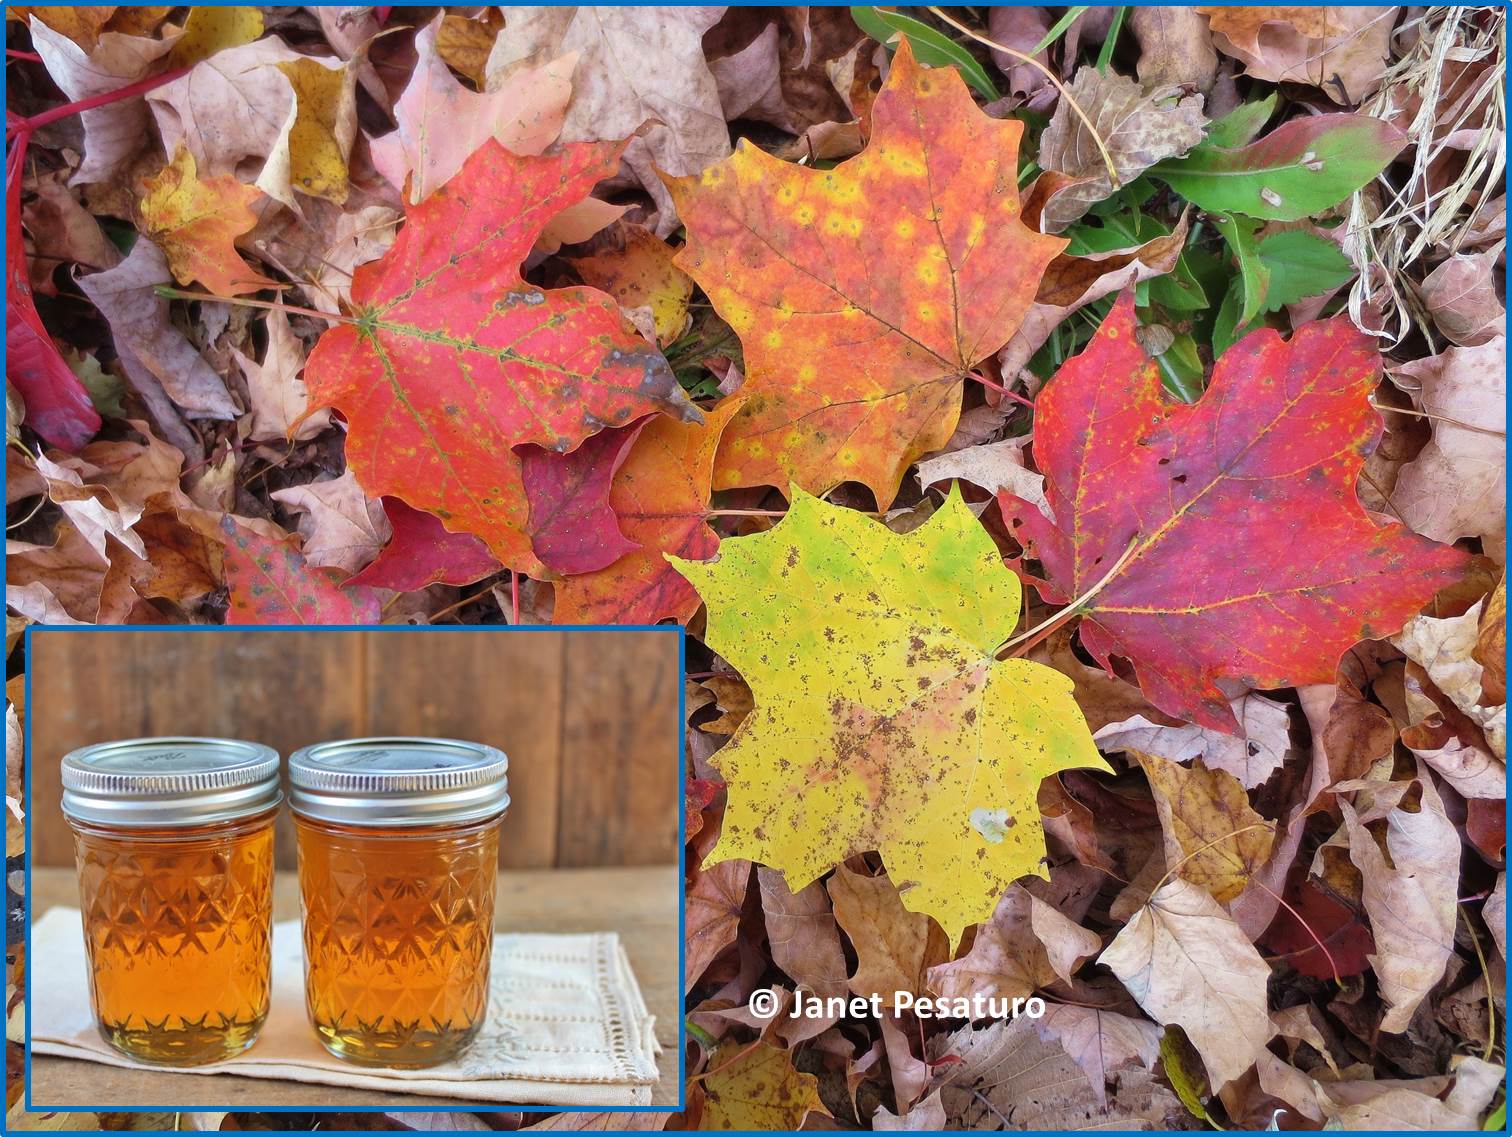
Learn how to make maple syrup, and you, too, can put up jars of liquid gold like these
Just a bit of personal info on how I got into this, if I may indulge. We were not a maple syrup family when I was growing up. Still very much entrenched in the traditions of our Italian roots, my family wasn’t much into New England culture, and maple syrup was an expensive non-essential. It wasn’t until I grew up and moved from our congested suburb of eastern MA, to”apple country” – as this part of the state is called – that I learned why people latticed the landscape with stone walls, what a “barred rock” is…and how maple syrup is made. I was thrilled when I realized that a row of large, stately sugar maples marked the boundary of one side of our new yard in Bolton. I just had to tap. Now for the how-to stuff.
Finding maple trees and deciding which to tap
The first step in making maple syrup is to find the maple trees. There are two main concerns here:
Tree health
Choose trees that leaf out well in summer, without many leafless, dead branches. Sap flows to feed living tissue only, so trees with a lot of dead branches will have less sap flow.
Tree species
Sap from at least several species of maple can be used to make maple syrup. In my area, all of the following can be used, and elsewhere, there are probably others:
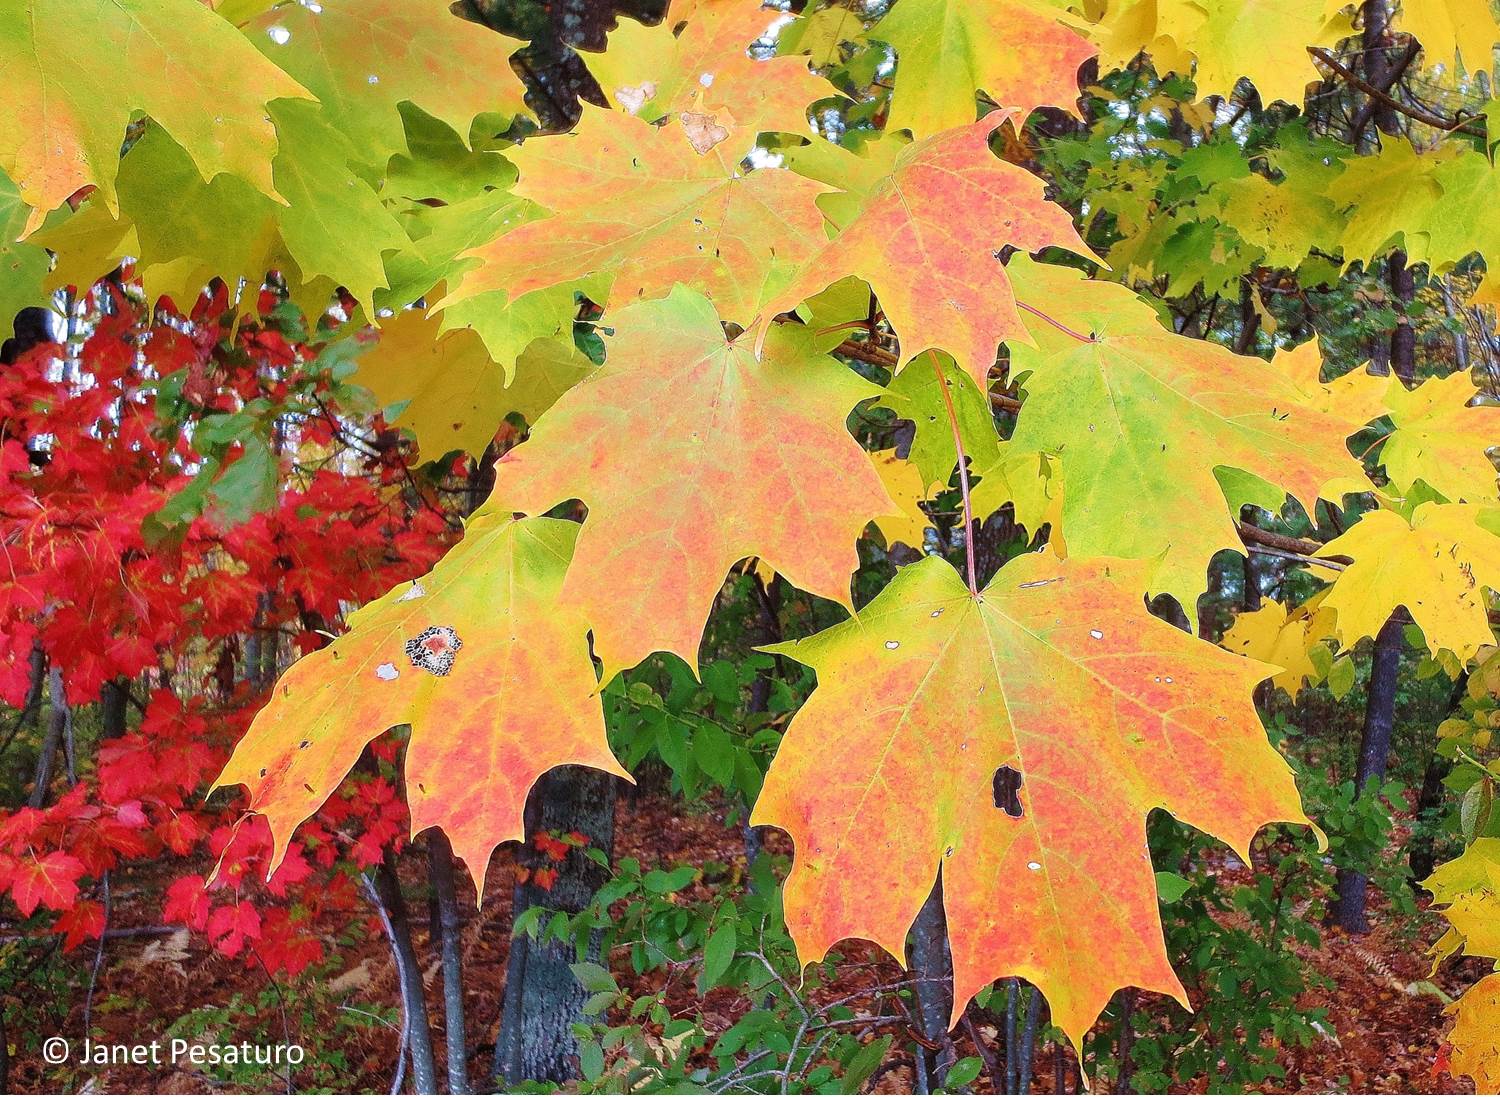
Sugar maple leaves
- Sugar maple (leaves at right, twigs below)
- Red maple (leaves and twigs below)
- Norway maple, with leaves like this
- Boxelder (ash-leaved maple), with leaves like this
- Silver maple, with leaves like this
Sugar maple (Acer saccharum) is used most commonly, because its sap contains almost twice the concentration of sugar than sap from other maples. This means that it takes about half the time and half the fuel to boil off enough water to create a syrup, so it’s worth your while to identify your trees, and use sugar maple if you have them.
Summer identification
Identifying the trees is easiest in summer and fall when the trees still have leaves. As you can see from the above links to leaf photos, boxelder and silver maple leaves are easy to distinguish from sugar maple leaves. However, sugar maple, red maple, and Norway maple leaves look very similar.
Let’s start with distinguishing sugar and red maple. It’s actually quite easy to tell them apart if you know a couple of key facts.
- The “sinuses” (see photo below) of sugar maple leaves are rounded, while those of red maple are are angular.
- The edges between the main points (see photo below) of sugar maple leaves are smooth, while those of red maple are serrated.
These photos say it better:
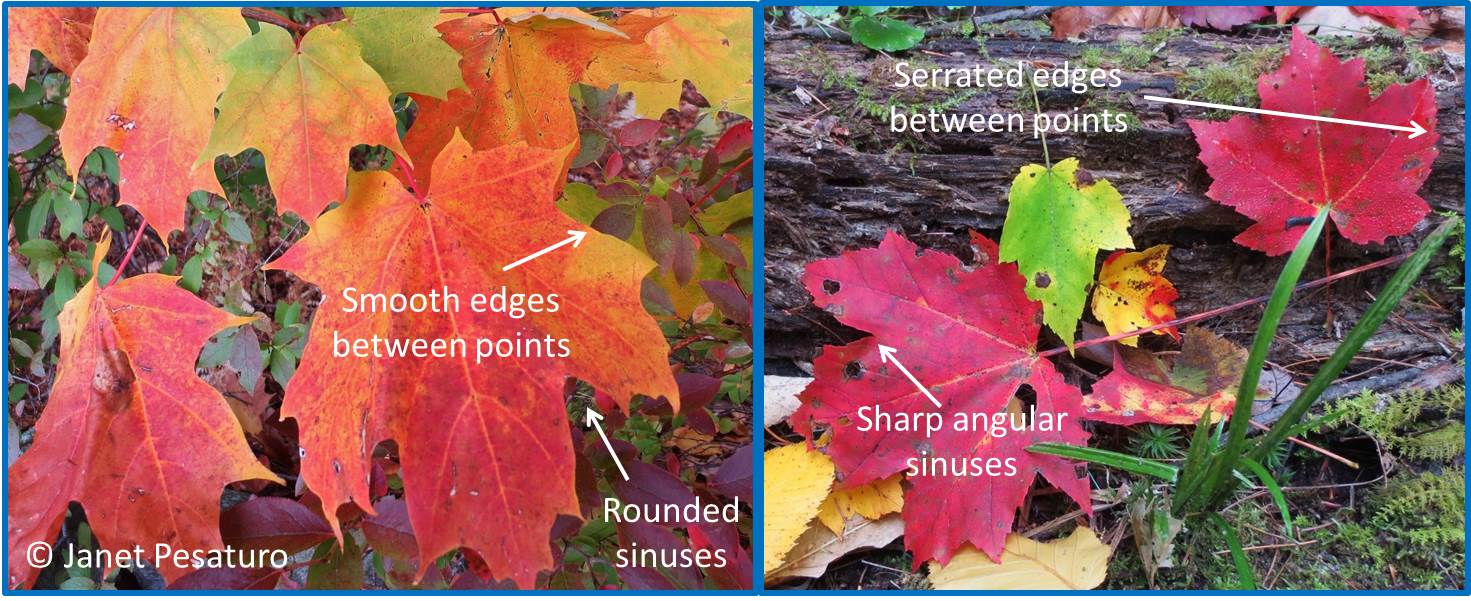
Sugar maple leaves (left) have rounded sinuses and smooth edges between the main points. Red maple leaves (right) have angular sinuses and serrated edges.
Unfortunately, Norway maple leaves are almost identical to sugar maple leaves, but the bark of Norway maple is distinctive with ridges in a sort of fishnet pattern as you can see here. Sugar maple bark is somewhat variable but never has that fishnet pattern.
Winter Identification
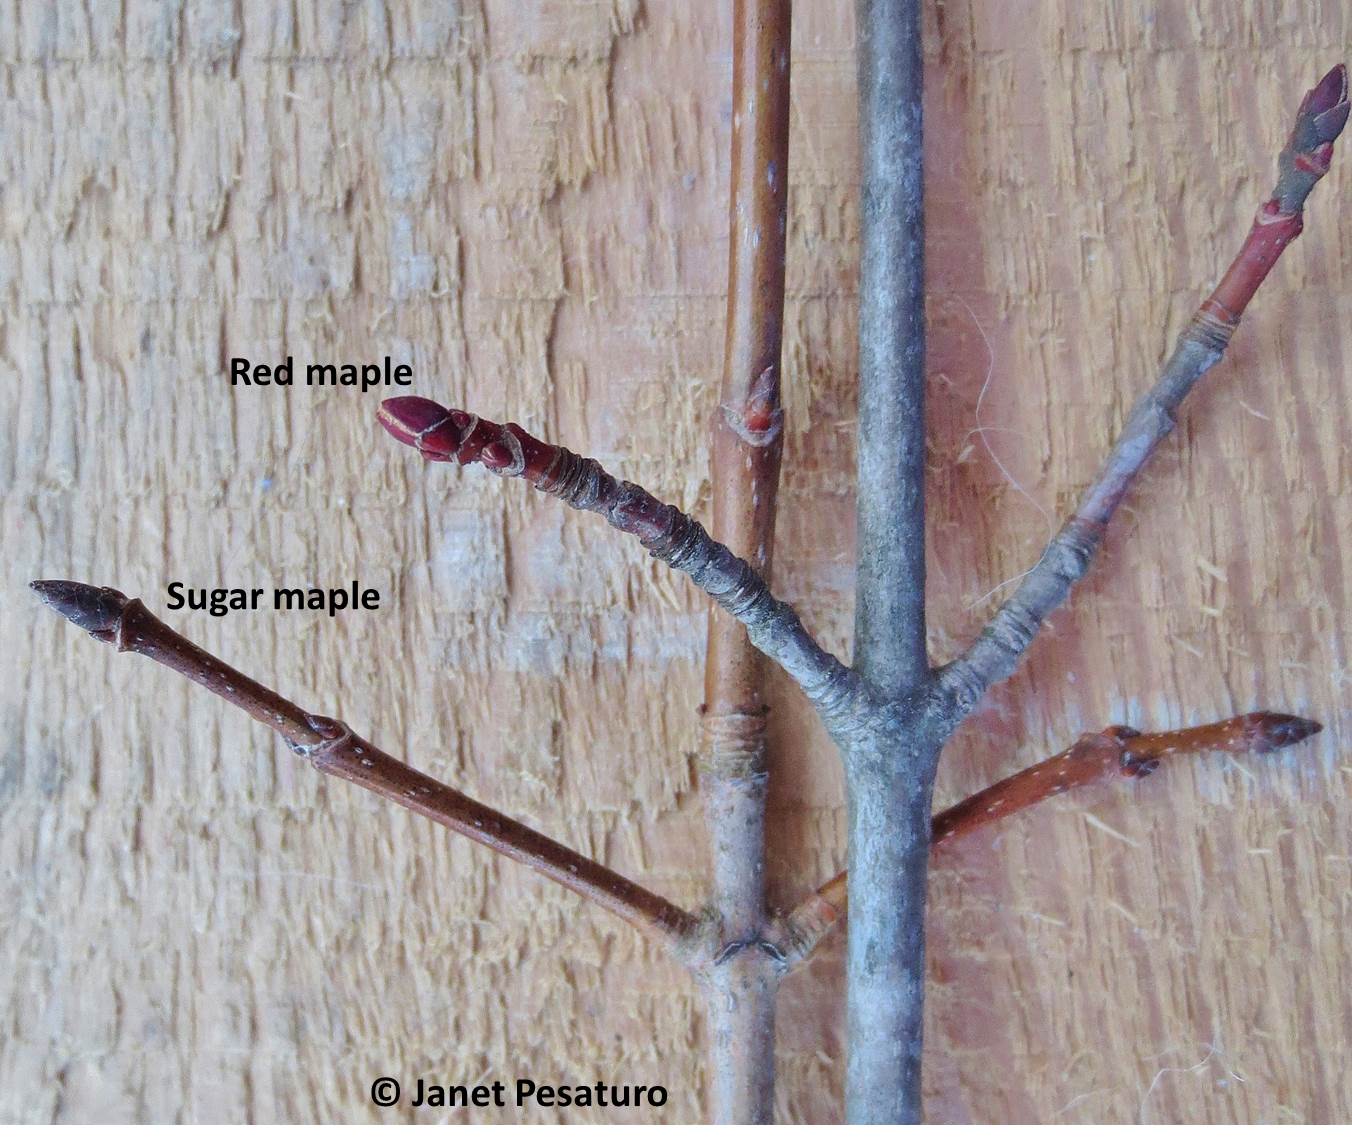
Sugar maple and red maple twigs. Click for larger view.
The leaves have dropped, so they won’t help, but if you’re able to reach a twig, you’re in luck. Sugar maple buds look like ice cream cones: Small, narrow, and pointed. The color is brownish-purple, and the buds have many tiny scales.
In theses photos, only sugar maple and red maple buds are shown, but none of the other maples have buds that look like sugar maple buds. All of them have buds that are red or green, and/or plump.

Closeup of red maple and sugar maple buds. Unlike buds of any other maple, sugar maple buds are narrow, pointed, brownish-purple, and have many scales.
When to tap your maples
Tap your trees when the sap starts to flow, which happens in late winter when day time temperatures rise above freezing, but night time temperatures are still dropping below freezing. Here in Massachusetts, that’s usually late February or early March, and continues for about a month.
Now, you might get an occasional warm sunny day in early February, but you want to wait until day time temperatures are rising above freezing somewhat consistently. You might get a day’s worth of sap if you tap early, but if you then get an extended cold snap (longer than a few days), the sap flow might stop completely and you will have to re-bore your holes.
What you need
Everything that is going to touch the sap should be washed and rinsed thoroughly, because impurities can give the syrup an off flavor.
- Tapping spiles (spouts)
- A drill with 7/16 inch drill bit (or whatever size is necessary for your particular spiles)
- Collection buckets or washed, recycled 1-gallon milk jugs
- Sap storage container. It is recommended that this be made of food grade material. (We use ordinary 5 gallon plastic buckets that have never been used for anything else, but we washed them well, and store the sap in them at cold temperature for no more than a few of days before boiling off.)
- A fine mesh strainer to remove bugs, bits of bark, etc., from the sap
How to tap the trees
Drill a hole in the tree about about 1.5 to 2 inches deep, depending on the thickness of the bark. Be sure you are angling slightly upward, so that sap will flow downward and into the bucket or jug. Pull the drill in and out to remove the shavings, and when you notice sap flowing, you’ve gone deep enough. Insert the spile, and tap it gently with a hammer to make sure it will stay.
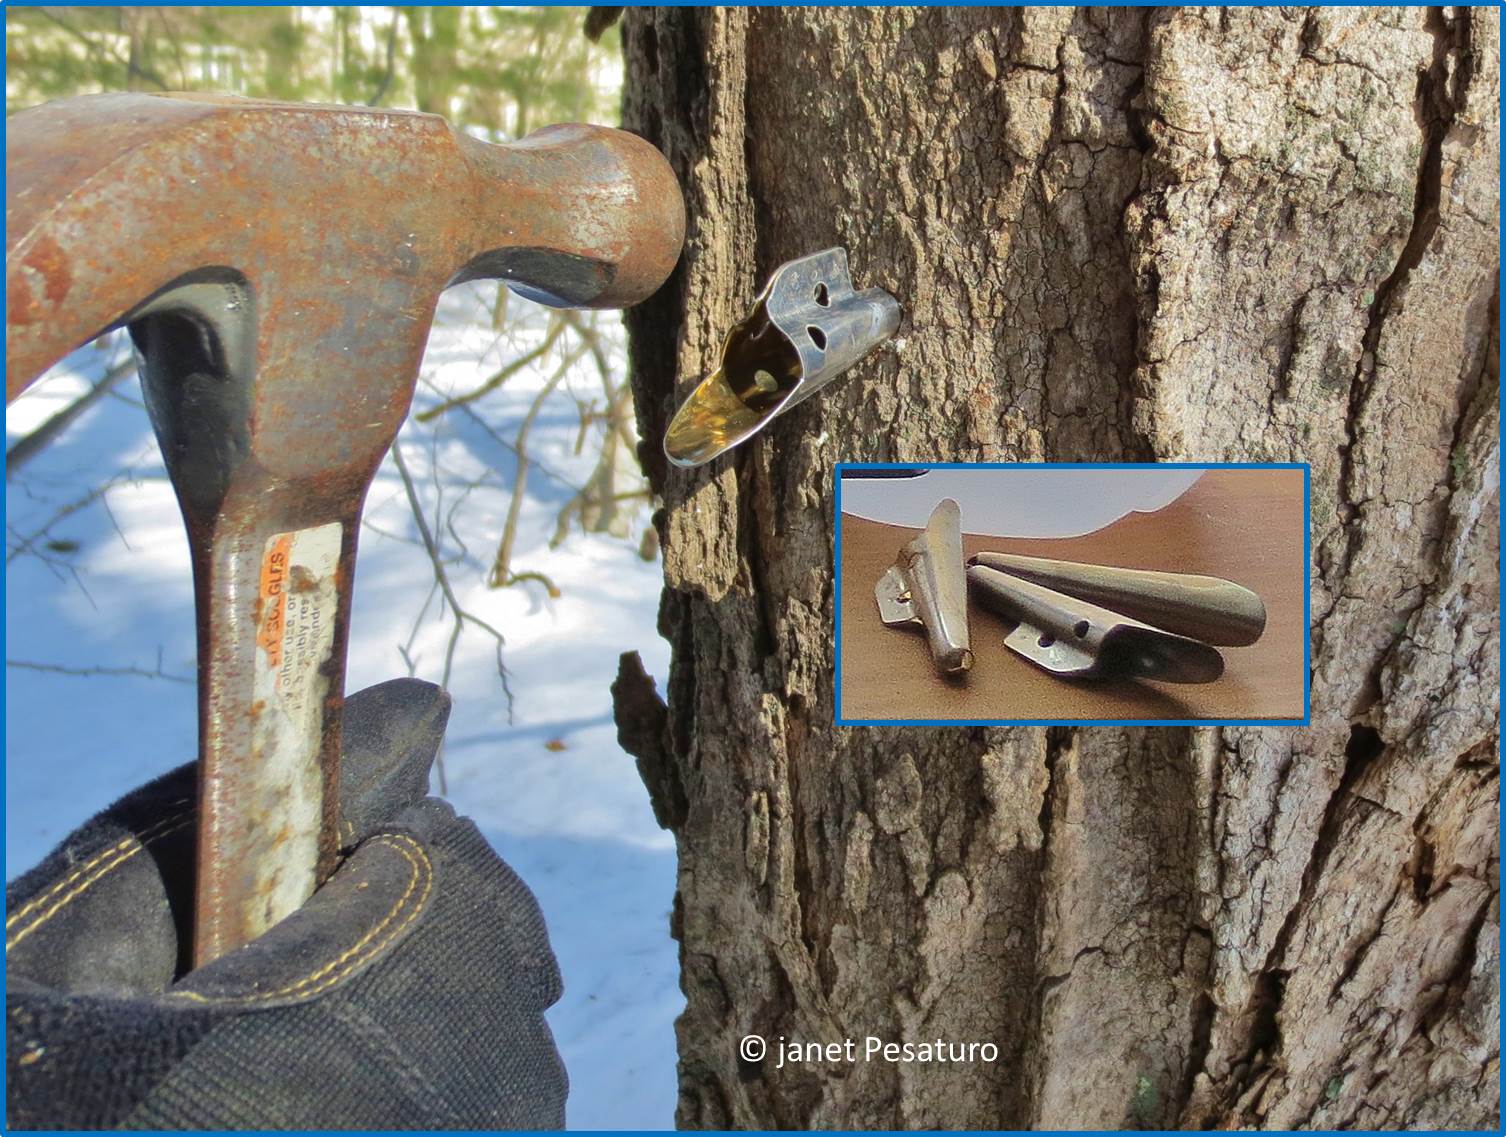
Inserting sap collection spout into a sugar maple
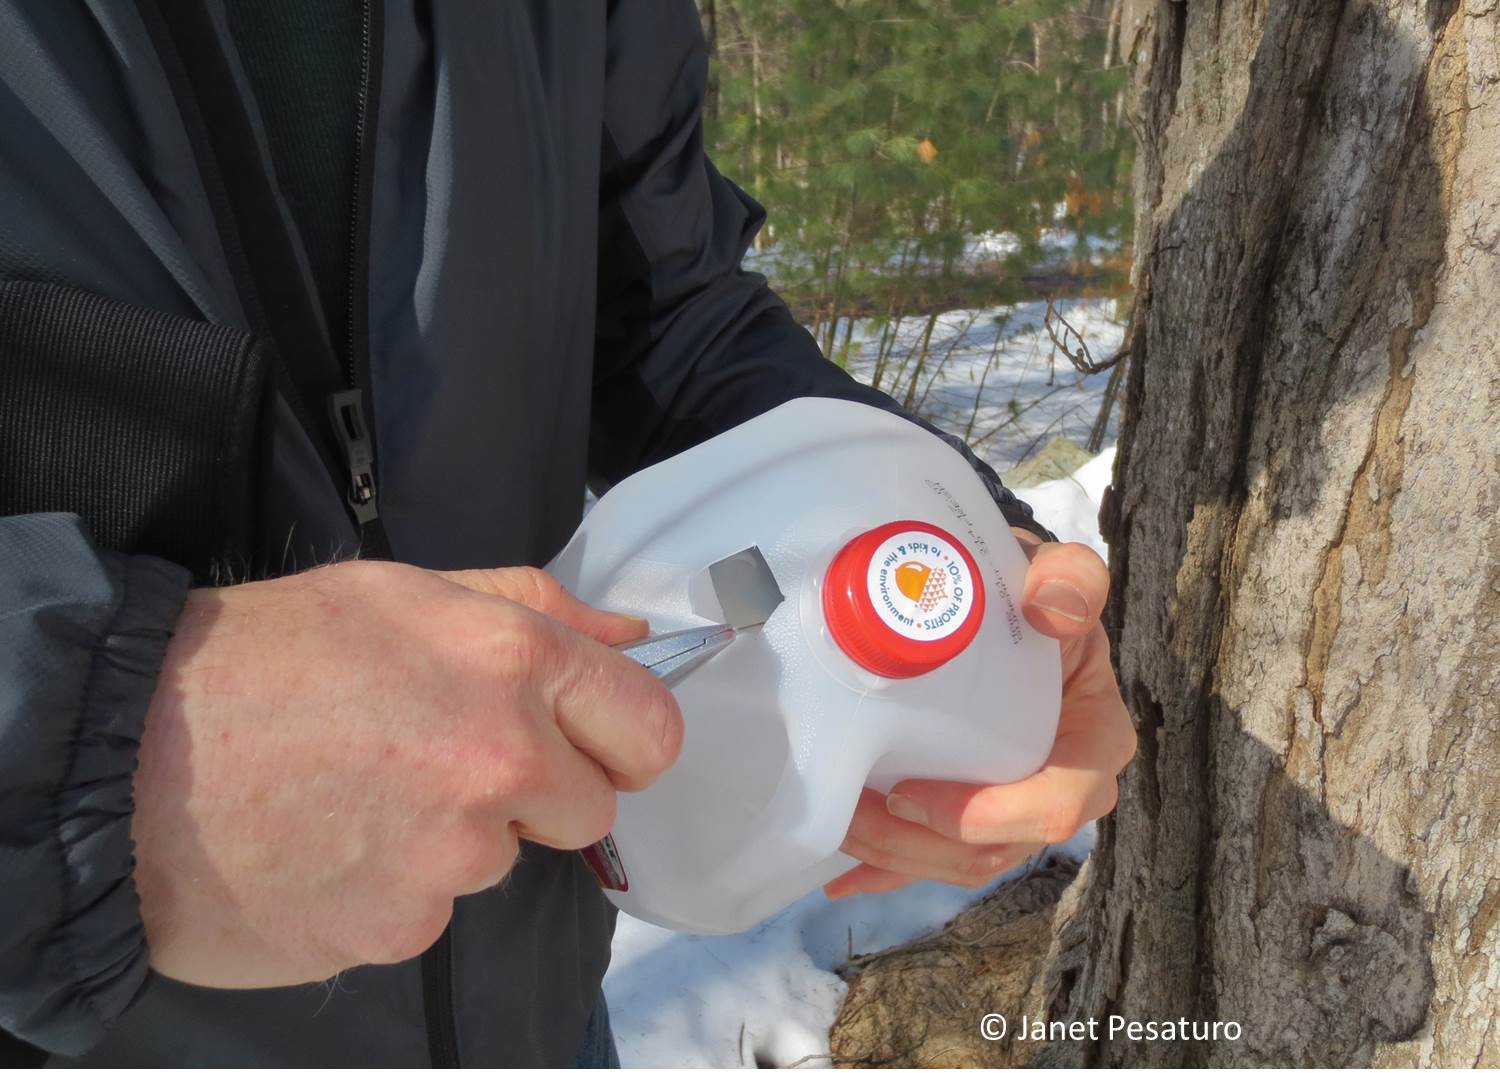
Cut a 3/4 to 1 inch hole in the shoulder of the jug, next to the handle
Sap spiles usually come with a hook from which you can hang a bucket, so if you’re using buckets, just hang it up and you’re done. But if you’re using recycled milk jugs, you’ll have to cut a 3/4 to 1 inch square on the shoulder of the jug, next to the handle, as shown in the photo to the right. Just hang the jug with the spout inserted into the hole. Leave the cap on the jug.
I have read that it’s best to tap the south facing portion of the tree trunk because sap flow is best within the portion of the tree facing the sun, but I have no idea if that is true.
How many taps per tree?
That depends on the size of the tree. In his book Backyard Sugarin’: A Complete How-To Guide, Third Edition, Rink Mann says the following:
- Tree under 10 inches diameter – Don’t tap
- 10-18 inch diameter – 1 tap
- 18-28 inch diameter – up to 2 taps
- Over 28 inch diameter – up to 3 taps
How much sap to expect
Per day: It varies from tree to tree, but on sunny, above freezing days, we get 1-2 gallons of sap per tap, which means emptying 1-gallon jugs once or twice a day. On cold, cloudy days, you might get less than a quart
Per season: We have found that each tap yields about 1 quart of finished syrup (about 10 gallons of sap) if we tap for the whole season, which lasts 3-4 weeks here. So with our 6 taps, we get about 6 quarts of syrup.
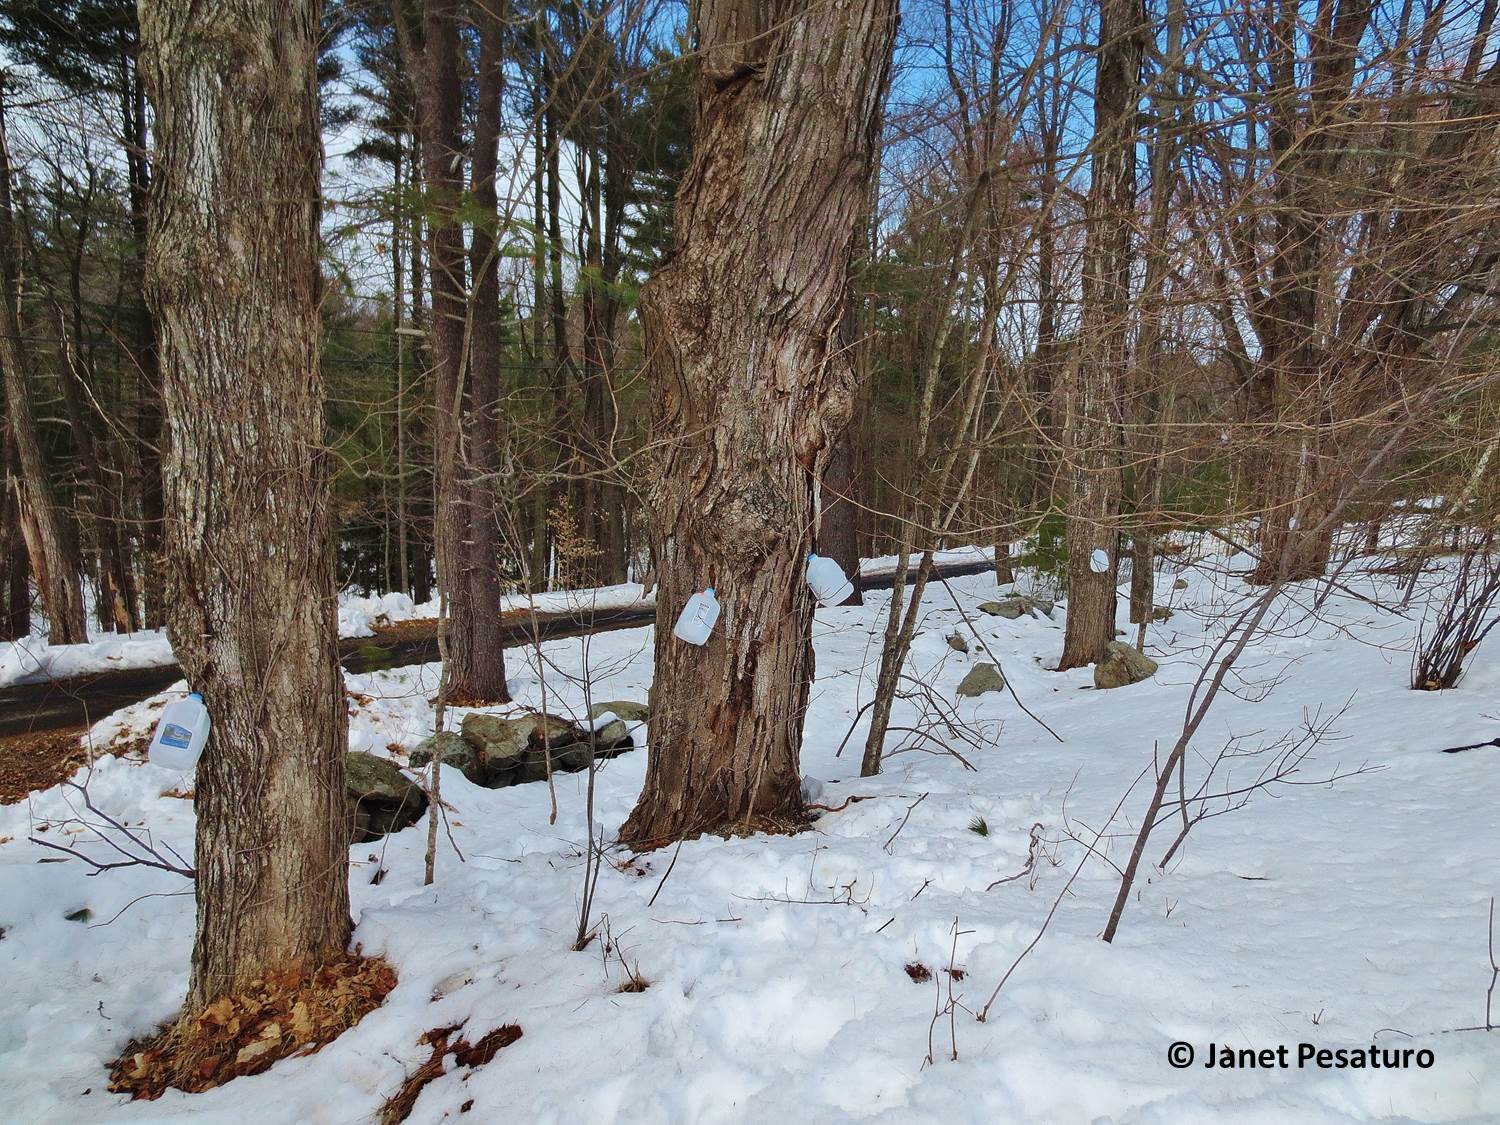
Our sugar maples with sap collection jugs in place
Collecting and storing the sap
Strain the sap as you pour it from the collection jug and into your storage container to remove insects, bits of bark, etc. I use a 5 inch diameter stainless steel fine mesh strainer. Cover the storage bucket to keep insects out, and store at refrigerator temperature or lower. Sap can spoil, just like any other sweet beverage. It’s best to boil it off as soon as possible, and I will cover that in my next post. I have read that it should be stored no more than 7 days, but I also know people who store it for longer. The boiling kills the bacteria, but the syrup tastes funny.
Continue on to Part II: Boiling, filtering, canning, and quality here.
Shared on: Backyard Farming Connection #72, Wildcrafting Wednesday #129, Fluster’s Creative Muster #63, Wake Up Wednesday Link Party #8, Waste Not Want Not Wednesday #65, Wicked Awesome Wednesday #152, HomeAcre Hop #62, Homemaking Party, Think Tank Thursday #73, From the Farm Blog Hop, Real Food Fridays #30, Freedom Fridays #20, Farmgirl Friday blog hop, Simply Natural Saturdays, Simple Saturdays #15, Heritage Homesteaders Hop #5, Simple Life Sunday #10, Thank Goodness it’s Monday #63, Homestead Barn Hop #152, Mostly Homemade Mondays #72, Natural Living Monday
