
How to Make Maple Syrup II: Boiling, filtering, canning, color, and flavor

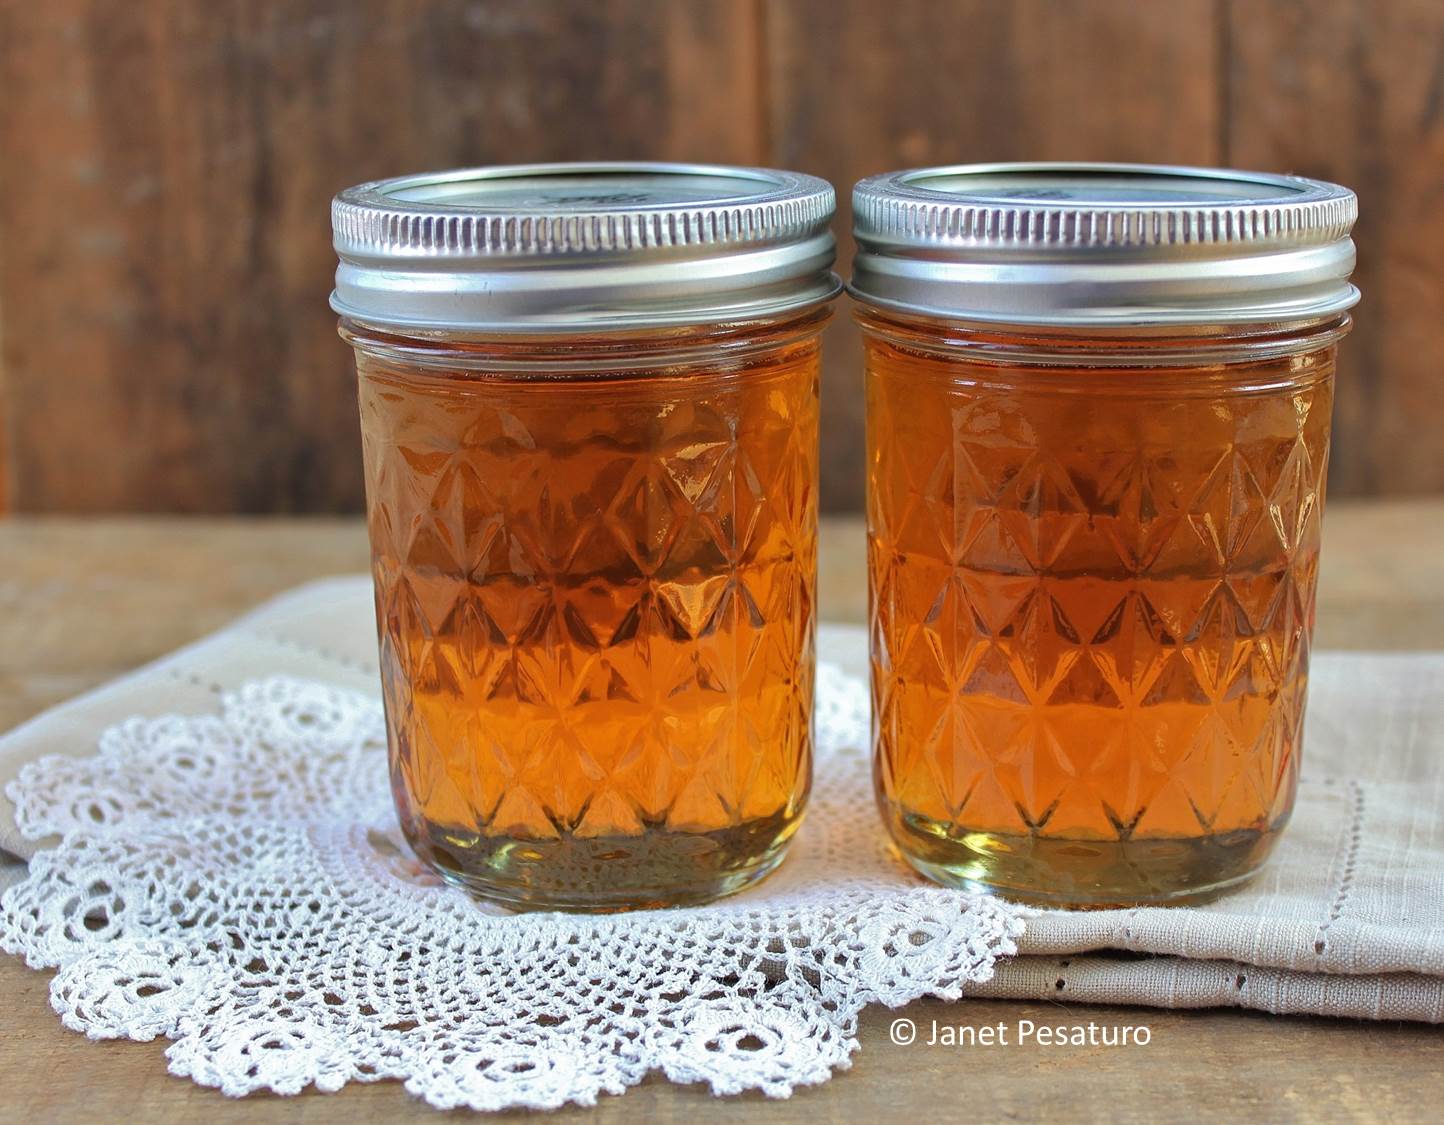
How to make maple syrup in your backyard. These are 2 jars of our own liquid gold.
This is the 2nd of a 2 part series on maple sugaring. In How to Make Maple Syrup I, I covered choosing trees and collecting sap. In this part, I describe pros and cons of boiling off indoors vs. outdoors, show our own backyard evaporator, discuss filtering and canning, and conclude with a few words on color and flavor.
Overview of how to make maple syrup as we do it
We have 6 taps which produce a total of 60-80 gallons of sap, yielding 1.5 – 2 gallons of syrup per season. We boil outdoors a few afternoons per week, and on some of the in-between days, I finish boiling the concentrated sap to the syrup stage in the kitchen.
- Evaporate over fire outdoors, scooping out particles and foam, as we see them, with a small, stainless steel, fine mesh strainer, until sap is gold but not yet as thick as syrup.
- Take concentrated sap indoors and filter through coffee filter.
- Store in refrigerator until ready to complete the boiling off.
- Boil concentrated sap in kitchen until it reaches a temperature of 7 degrees over the boiling point of water (varies with elevation).
- Skim off foam, if necessary.
- Pour into sterilized canning jars, leaving appropriate head space, and cover with sterilized lids and rings.
- Process in boiling water bath for 10 minutes.
- Remove jars from water bath and store at room temperature. (We store for up to a year, but I’m not sure what the official recommendation is.)
Where to boil off the sap
Small producers like backyard sugarers have three options, and there are pros and cons to each.
Boil it off all in the kitchen
If you’re only making a few quarts of syrup and you have a good range hood with a powerful fan, you might find it convenient to do all the boiling off in the kitchen. I’ve actually boiled our season’s worth of sap (60-80 gallons total) in the kitchen, in past years. It took a long time but it did not result in a sticky coating all over the kitchen (some sources say it does, but it didn’t), and the moisture was welcome, given the extremely dry air here at this time of year. The resulting syrup was extremely pure in flavor. The downside of boiling off indoors is that it’s a very slow process.
Do most of the boiling outdoors over fire, then finish in the kitchen
This is what we do now. Boiling outdoors, where the cold, dry air quickly sucks the steam up from boiling sap, spread out over large, flat pans, goes much more quickly. The disadvantage is that there is usually some scorching of the solids on the sides of the pan as the sap boils down. Little pieces of this char fall into the sap and can give the syrup an off flavor. The longer that stuff cooks in the sap, the stronger the off flavors. So I bring it indoors when it’s beginning to turn gold, filter through a coffee filter, and finish boiling in the kitchen.
Boil the sap to syrup all outdoors
This is fastest and easiest, but outdoors is a less controlled environment, and you can expect off flavors in some batches. You can scoop out some of the char with a strainer, but some of it will be small enough to pass through the strainer, and won’t be removed until you filter through something like a coffee filter. You will want to filter at the end, and if you don’t want those particles cooking in your syrup throughout the entire process, you’ll want to also filter it when part way done.
An outdoor evaporator

Maple sap evaporator made of concrete blocks, buffet pans, and HVAC duct pipe
My husband built a simple evaporator made with cinder blocks based on this one, and 4 inch deep 12 x 24 buffet pans, like these: Excellante Full Size 4-Inch Deep 24 Gauge Anti Jam Pans
We configured the blocks slightly differently, and added a base of 4 x 8 x 16 inch concrete blocks. With this, we can boil about 10 gallons of sap down to 1 gallon in an afternoon, before bringing it indoors to filter and finish boiling it to syrup.
One problem with the above set-up in our photo, is that smoke could come up over the pan in the front, giving the syrup a slightly smoky flavor. So we got an additional block and adjusted it slightly, so that the top layer of blocks was closed. We add wood to the fire through the opening in the bottom layer, and most of the smoke comes out of the pipe.
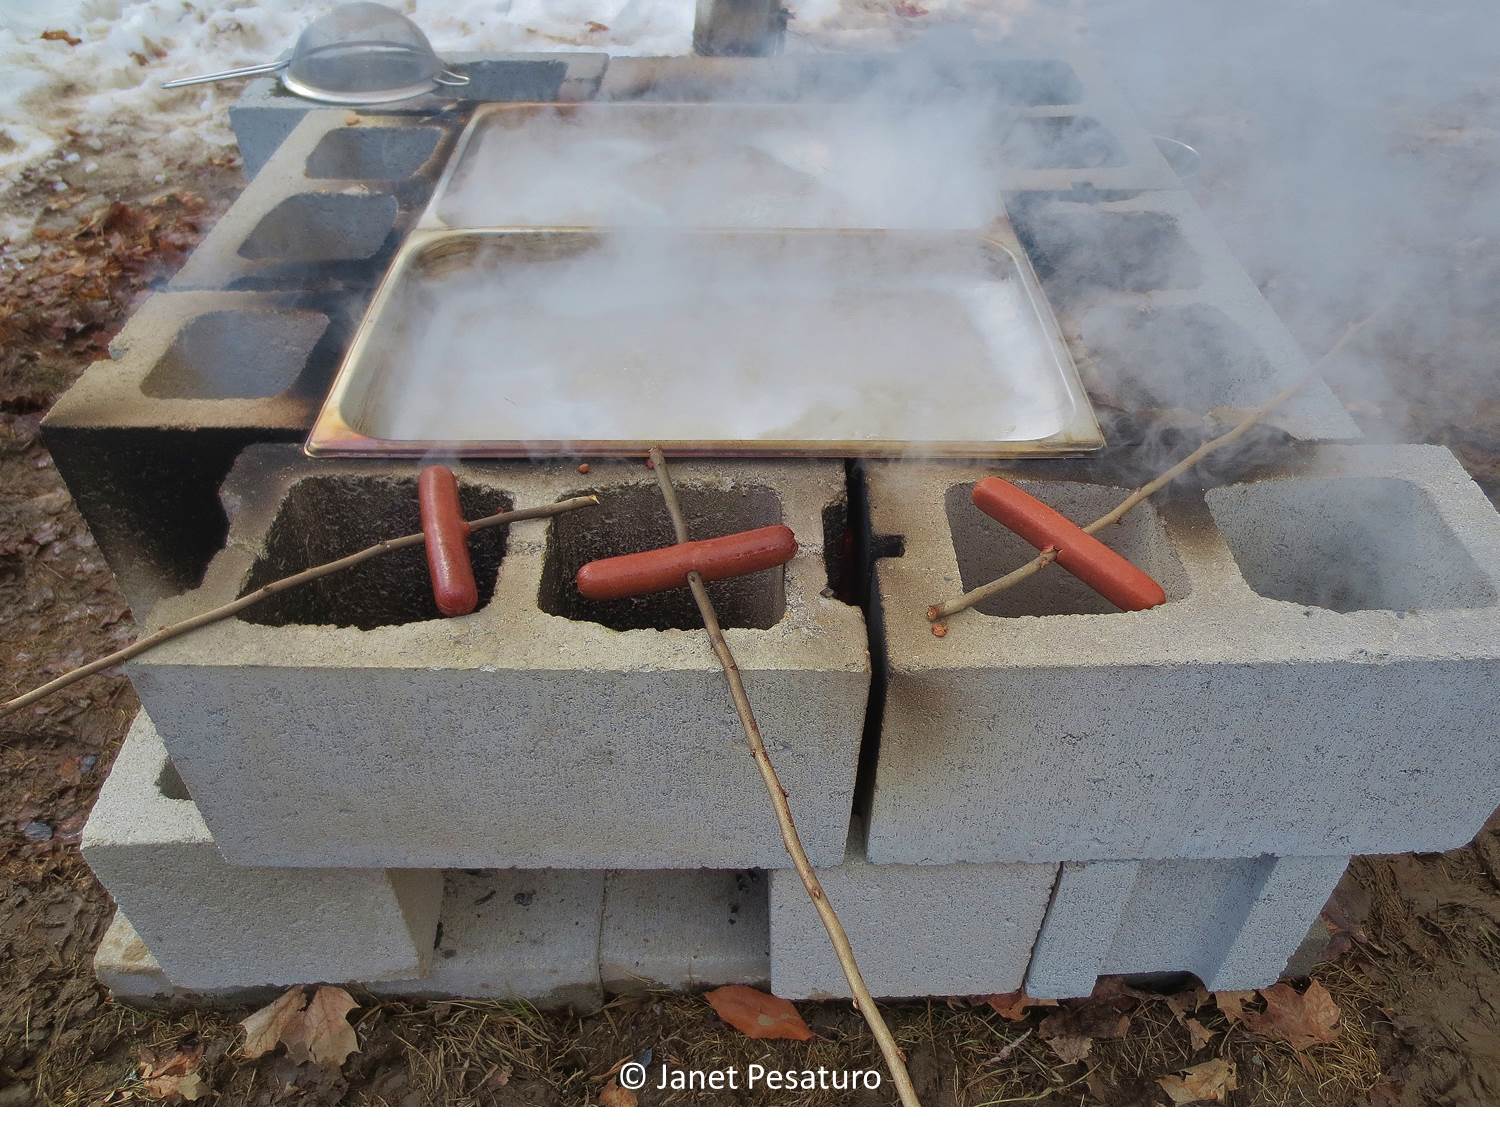
Evaporator adjusted so that pans are completely surrounded by blocks, keeping smoke away from sap. Evaporator even doubles as a wienie roaster.
Should you filter the finished syrup?
If you notice any dark solids in the syrup, you should definitely filter again. If you filter that stuff out, immediately after bringing the concentrated sap indoors, you shouldn’t have any brown or black solids in your finished syrup. Should you still filter it?
You will notice whitish, feathery looking solids in the syrup. If you don’t filter, they make the syrup looks cloudy at first, but eventually settle to the bottom. This material is sometimes called niter, but I think that is misleading, at best, since niter technically refers to potassium nitrate. There might be some of that in this sediment, but studies have shown the main constituent is calcium malate, a compound that gives certain fruits a pleasantly sour taste. However, there is also some sugar in it, for I have filtered it out and tasted it. It is sweet. So I prefer the other common name for those whitish solids: sugar sand.
Should you filter out the sugar sand? Conventional wisdom and many sources say yes, claiming that it gives the syrup an off flavor. I believe that is incorrect. I don’t filter our finished syrup, and it is delicious. I agree with these Chautauqua County, NY producers, that filtering maple syrup is only for aesthetics, and removes harmless, naturally occurring substances.
The important stuff to filter out is the black char and any other debris that gets into the sap, but I would not wait until the syrup is finished to filter that out. The longer it sits in the boiling sap, the more likely your syrup will have an off flavor.
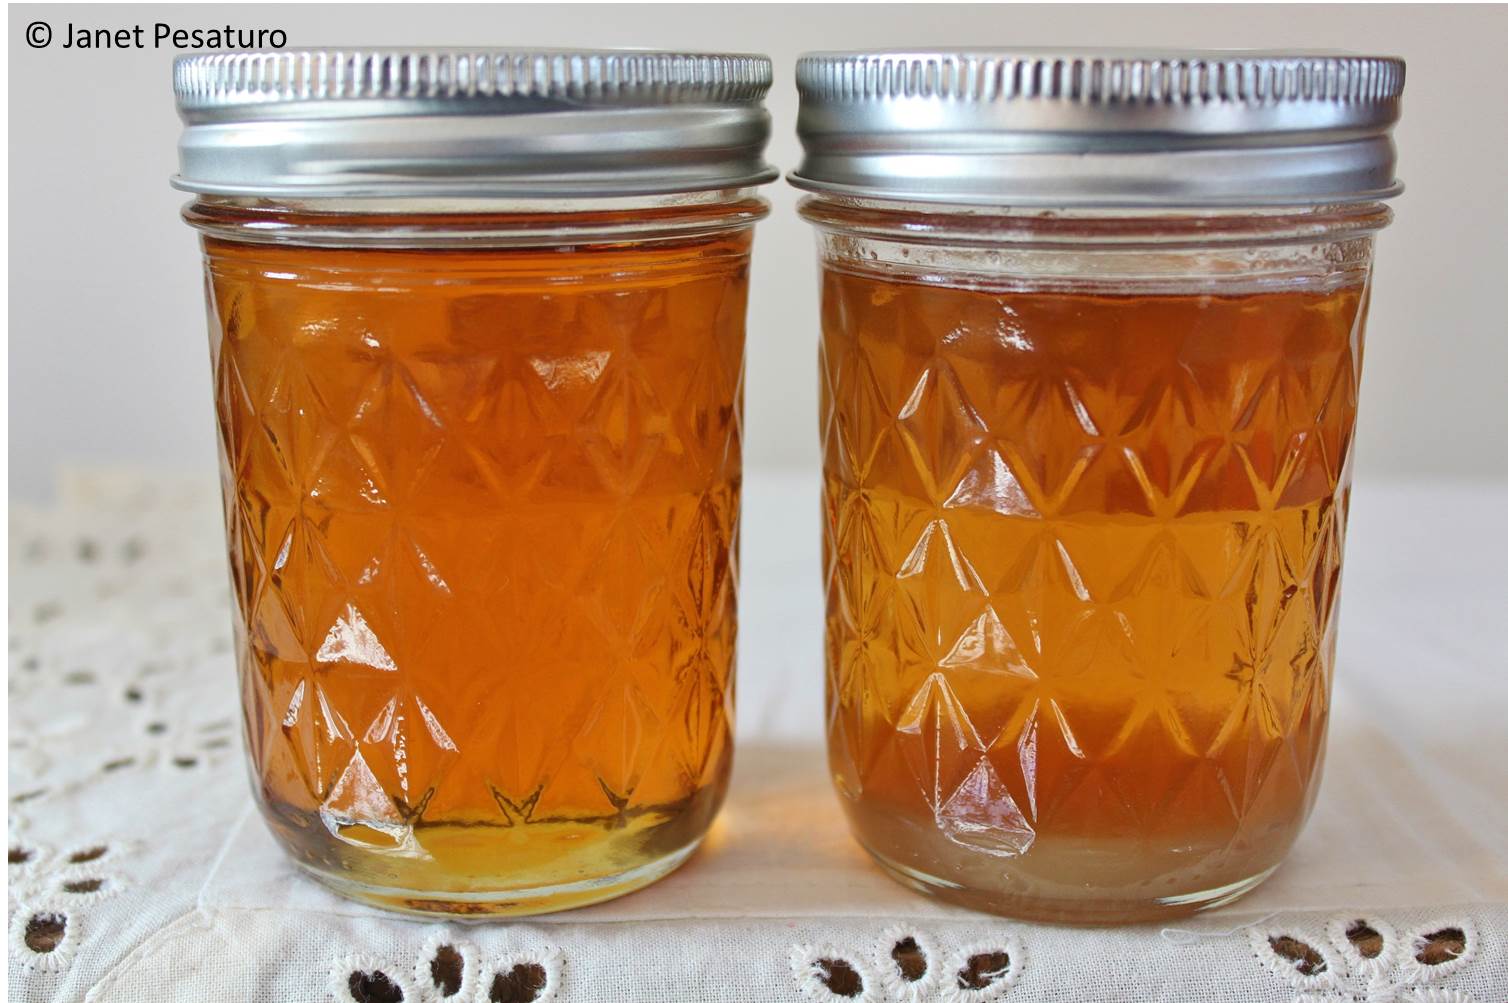
Filtered syrup at left. In unfiltered syrup at right, you can see a whitish sediment, “sugar sand”, at the bottom.
Canning the finished syrup
I want to be able to safely store the syrup at room temperature for months, so I pour it into sterilized 8 ounce canning jars, leaving appropriate head space, and process it in a boiling water bath for 10 minutes. Same process as for jellies and jams.
Color and flavor of maple syrup
The color and flavor of maple syrup depend on several factors:
- Time during season when sap was collected
- Genetics of the tree
- Soil type
- Weather conditions
- Processing
The chemical composition of maple sap changes over the course of the season, but more importantly, the increasingly warm weather causes bacteria in the environment to proliferate more quickly, and colonize the sap as it is collected. These bacteria convert sucrose, the dominant sugar in maple sap, to glucose and fructose. When the sap is heated, glucose and fructose (but not sucrose) can react with amino acids in the sap. This produces a mixture of molecules that cause browning and give the syrup a stronger flavor. Known as the Maillard reaction, this is the chemical process in cooking which creates the yummy flavors of well browned foods.
Our maple syrup tends to be lighter on color and more delicate in flavor than syrup we’ve tasted from other New England farms. We do get darker syrup later in the season, but it only gets about as dark as medium amber. Maybe this has to do with factors, like soil and tree genetics, that we can’t control. Some people might find it frustrating that they can’t get their syrup to look and taste exactly like the syrup they buy in the store, but I think it’s kind of cool that geography and genetic diversity factor into maple syrup.
Sources:
- Biology of Maple Sap Flow, St. Johns University
- The Different Colours and Tastes of Maple Syrup, Danbrie Farms
- Chemistry of Maple Syrup, by Steven Childs
- Cornell Sugar Maple Research & Extension Program
I love receiving comments and questions! Have you made maple syrup? What are your thoughts on boiling off, filtering, and canning?
Shared on: Backyard Farming Connection #72, Wildcrafting Wednesday #129, Fluster’s Creative Muster #63, Wake Up Wednesday Link Party #8, Waste Not Want Not Wednesday #65, Wicked Awesome Wednesday #152, HomeAcre Hop #62, Homemaking Party, Home and Garden Thursday, Think Tank Thursday #73, From the Farm Blog Hop, Real Food Fridays #30, Freedom Fridays #20, Farmgirl Friday blog hop, Simply Natural Saturdays, Heritage Homesteaders Hop #5, Simple Life Sunday #10, Thank Goodness it’s Monday #63, Homestead Barn Hop #152, Mostly Homemade Mondays #72, Natural Living Monday, Down Home blog hop #81, Wellness Wednesday #41, Mountain Woman Rendezvous #39