
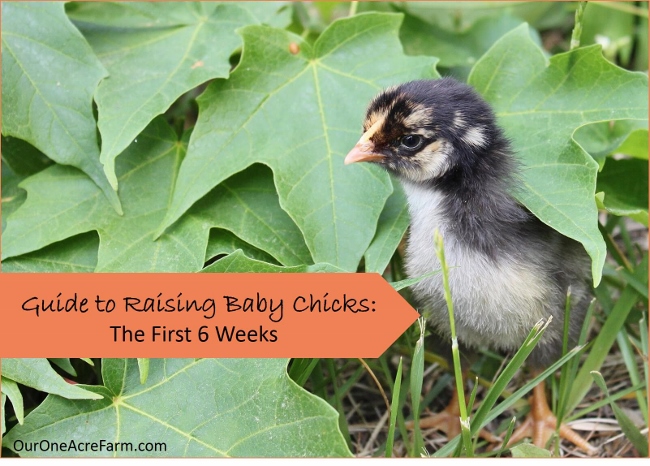
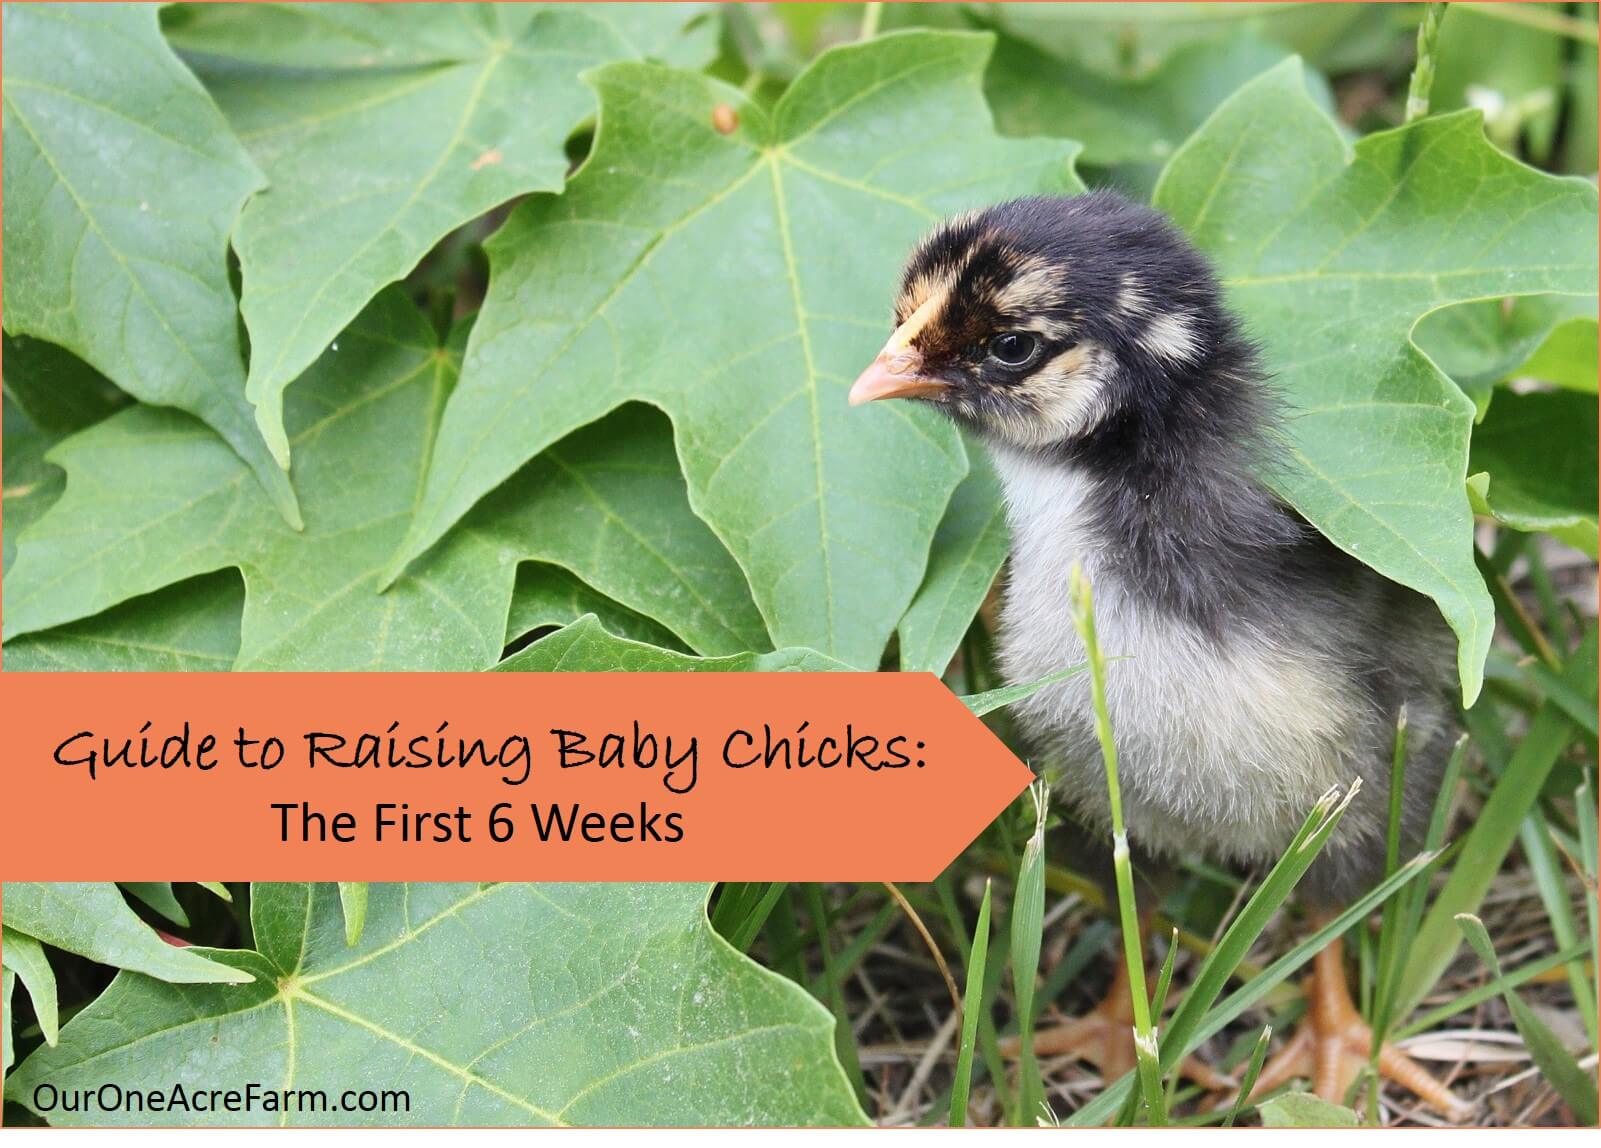
Raising Baby Chicks Without A Hen: The First 6 Weeks
A 2-day old golden laced Wyandotte chick explores greenery for the first time.
Few things are as exciting as baby animals on the farm in spring. I add a few chicks to our flock about every other year, and I’m delighted that this year is a chick year. This year, like most years, I bought them from a hatchery. But when we had a rooster to fertilize the eggs, one of our hens hatched and raised 3 chicks. Seeing how a hen does her job gave me a better understanding of my job raising chicks in a brooder, and I believe I’m a better chick mom because of her. So here’s my guide to raising baby chicks without a hen, with insight gained from a little bantam hen who did it the old fashioned way.
Raising Baby Chicks Without A Hen: The First 6 Weeks
This concise but thorough guide to raising baby chicks covers the following:
- Buying day-old baby chicks
- When to start your chicks
- What you need
- Setting up the brooder
- Chick arrival day
- The first few days
- The first 6 weeks: warmth, space, and stimulation
1. Buying day-old chicks
People new to chickens are often shocked that baby chicks are routinely packed in a box and sent through the mail without eating or drinking during a 1-3 day journey. This is possible because just prior to hatching, baby birds absorb the yolk sac, which provides sufficient nourishment for a few days days. Why should baby birds be capable of surviving a few days without food? Because in the wild, all of the eggs in a nest do not usually hatch on the same day. They hatch over a few days. So in order to hatch the entire clutch, the hen must continue to brood the slow pokes, even after the early birds hatch. Those early birds, nourished by the yolk sac, can sit tight with the unhatched eggs under the hen as she broods. When all or most of the eggs have hatched, the hen brings all her chicks to begin foraging.
Most backyard flock masters buy their chicks from a hatchery or local farm and garden store. I prefer ordering my chicks directly from the hatchery for these reasons:
- Local farm and garden stores get their chicks from hatcheries, so the chick has to be transported twice – from the hatchery to the store, and then from the store to my brooder. I prefer to subject the chicks to as little stress as possible.
- Local farm and garden stores usually order a very limited selection of breeds, while some of the hatcheries have a large selection. Order directly from the hatchery, and you can get what you want.
- Local farm and garden stores usually have chicks available for a limited time in spring. In my area (MA), this is early-mid spring. I prefer to start my chicks in late May, by which time the stores here no longer sell them.
- If you order directly from the hatchery, you can request that chicks be vaccinated or not be vaccinated.
You’ll probably find several hatcheries which offer the breed(s) you want, so to narrow down your source, try to determine how long it will take the chicks to get from the hatchery to your post office. It makes a significant difference in the health of the chicks at the time of arrival. I’ve experienced chicks with 1, 2 and 3 nights in transit. All chicks in the 1 night group were perky. Some chicks of the 2 night groups were a bit droopy, and some in the 3 night group were dead on arrival. Ask which days of the week they mail the chicks. My 3-night transit batch of chicks came from a hatchery which mailed chicks only on Saturday. Sunday is an off day, adding an extra day for the chicks. I never ordered from them again.
One disadvantage to buying chicks from a hatchery is the minimum order size. To ensure that the chicks will keep warm while in transit, many hatcheries have a minimum order size of 25 chicks. If your order is too small, the hatchery will add “males for warmth”. Most people don’t want these roosters. However, it may be possible to find a few people in town with whom you can place a joint order. And if you can’t, try Meyer Hatchery or My Pet Chicken, which fill small orders for a premium price, adding hand warmers, instead of extra males, for warmth. Or, buy the chicks from a local farm or store.
I prefer to start chicks in mid-late spring, so chicks can have some outdoor time during the warmth of the afternoon.
2. When to start your chicks
Unlike newly hatched chicks of many bird species, day old baby chickens can walk, eat, and drink on their own. But one thing they normally get from the hen and can’t live without, is warmth. You must provide that. As long as you are able to provide supplemental heat for as long as they need it, you can start chicks at any time of year. Here in Massachusetts, I prefer to start them in late May, because by then it’s warm enough to give the chicks a little outdoor access (in a protected areas). And, by mid-June, it’s warm enough for the chicks to spend most of the daylight hours outside. Many people, even here in New England, start them in early spring to be sure the females begin to lay eggs before winter, but that usually means the chicks spend much time confined to the brooder during those chilly spring days. Just be sure you’ve got plenty of brooder space, if you choose to raise them in cool weather.
3. What you need
I brood our chicks in this 4 x 2 ft box in our sun room, where this is plenty of natural light.
A place to brood them. Some people brood them in the house for the first few weeks, in the basement, or in a barn, shed, etc. I use our sun room because it’s bright and sunny, well ventilated, and I can check the chicks during the night without going outside.
A brooder box – I prefer a long narrow shape, so I can provide a warm end to simulate the warmth of the hen, and a cool end for the chicks to explore as they feel comfortable (see below). Other possibilities for a brooder include a large plastic tub or a child’s swimming pool. Some people just use brooder guard (see below) on litter directly on the basement or shed floor.
A heat source which can maintain a temperature of 90-95 degrees F at one end of the brooder, and which can be raised and lowered so you can regulate temperature. If your brooder box is small, or if you are in a warm climate, you might need nothing more than 60 or 100 watt bulb. Here in Massachusetts, I need a 250 watt infrared heat lamp over my 8 square foot brooder box, even in spring. If you use one of these head lamps, take great care to mount it securely, as they are real fire risks! Another option is the Ohio Brooder, which you can make yourself (see sources).
A thermometer in the brooder box is a good idea. I tape an inexpensive one to the wall of the warm end of the brooder.
Light stimulates activity and eating, and therefore growth. If you raise your chicks in a dark basement under an infrared heat lamp, you’ll probably need to keep a regular light on during the day to keep them active. This is one reason I start mine in our sun room.
A brooder guard to protect from drafts and to prevent young chicks from piling up in a corner, potentially suffocating the bottom chick, to keep warm. You do not need this if your brooder has no corners (e.g., a child’s round swimming pool). I use brooder guard because my brooder is a box with 4 corners. You can make a brooder guard out of cardboard boxes, or buy a roll of it. You can see what it looks like in my photos. I typically remove it when chicks are 1-2 weeks old, strong enough to get out from under the other chicks, should they pile up.
A cover for the brooder which excludes cats and prevents older chicks from flying out, but allows exchange of air and penetration of light. I place an old screen over the brooder box.
Paper towel is an excellent bedding for at least the first 2 days, for several reasons:
- You can sprinkle the food on it, allowing the chicks to indulge their natural tendency to forage by pecking and scratching the ground. Eating from a feeder takes a little bit of learning, so it’s best to get them going in a way that comes naturally.
- It keeps them from eating litter, which can cause malnutrition, crop impaction, and constipation.
- It’s got enough friction so chicks won’t slip. Do not use newspaper (or other smooth paper), which is too slippery. Slipping can cause leg injury.
Bedding will be necessary once the paper towels are removed. One of the most common materials is pine shavings, which is what I use. Shavings are soft and absorbent, keeping the litter dry. Moist, poopy litter is a great substrate for the proliferation of pathogens (disease causing micro-organisms). Other inexpensive and widely available materials for bedding include crushed corn cobs and chopped straw. Whatever you use should be soft, absorbent, and nontoxic.
Ventilation is important for chickens of all ages. Poor ventilation, especially in a tight space, quickly results in build up of ammonia and excessive moisture, both of which can contribute to disease processes.
Food is an obvious necessity, and unless the chicks will have access to good habitat (high plant diversity), or unless you want to put some thought into developing a homemade balanced chick ration, I highly recommend commercial chick starter. There are many brands, and they contain 18-20% protein. A higher protein diet which is otherwise balanced for chicks is fine, but a lower protein diet will result protein deficiency. Do not feed them layer ration. It’s too low in protein and too high in calcium. Commercial chick feed is available unmedicated, or medicated. Medicated feed contains an anti-coccidial agent, which helps prevent coccidiosis, a common cause of diarrhea in chicks. I use medicated feed, because I brood chicks in late spring, when weather is warm enough allow proliferation of coccidia. The risk of coccidiosis is lower if you brood them in cool weather. Some hatcheries offer a vaccine for coccidiosis, making medicated feed (generally) unnecessary, and generally not recommended, since anti-coccidial medications can kill the organisms in the live vaccines that are typically used in backyard flocks. (However, this post is obviously not meant to be an in depth discussion of coccidiosis treatment and prevention. Consult additional sources for further information, and make your own decisions. I am not responsible for the death of your birds, however you choose to manage them.)
Chick feeders come in a variety of sizes and shapes. You might need a couple of different sizes, so you can switch to a larger one as the chicks grow. I start with small round feeders shown the photo. Be sure you have enough feeders for all chicks to feed at the same time. Place the feeder(s) near the warm end of the brooder, but not directly under the lamp. As the chicks grow, they spend more time away from the warm area, so move the feeder further towards the cool end of the brooder. When chicks are about 2 weeks old, I switch to a larger, hanging feeder. Then, when they move out to the coop (around 4-6 weeks), they are ready for an adult chicken feeder. I keep the top of the feeder covered with an inverted aluminum foil pie plate, as in the photo, to prevent chicks from standing on top and feeding from the reservoir. I adjust the height using the hooks as shown in the photo.
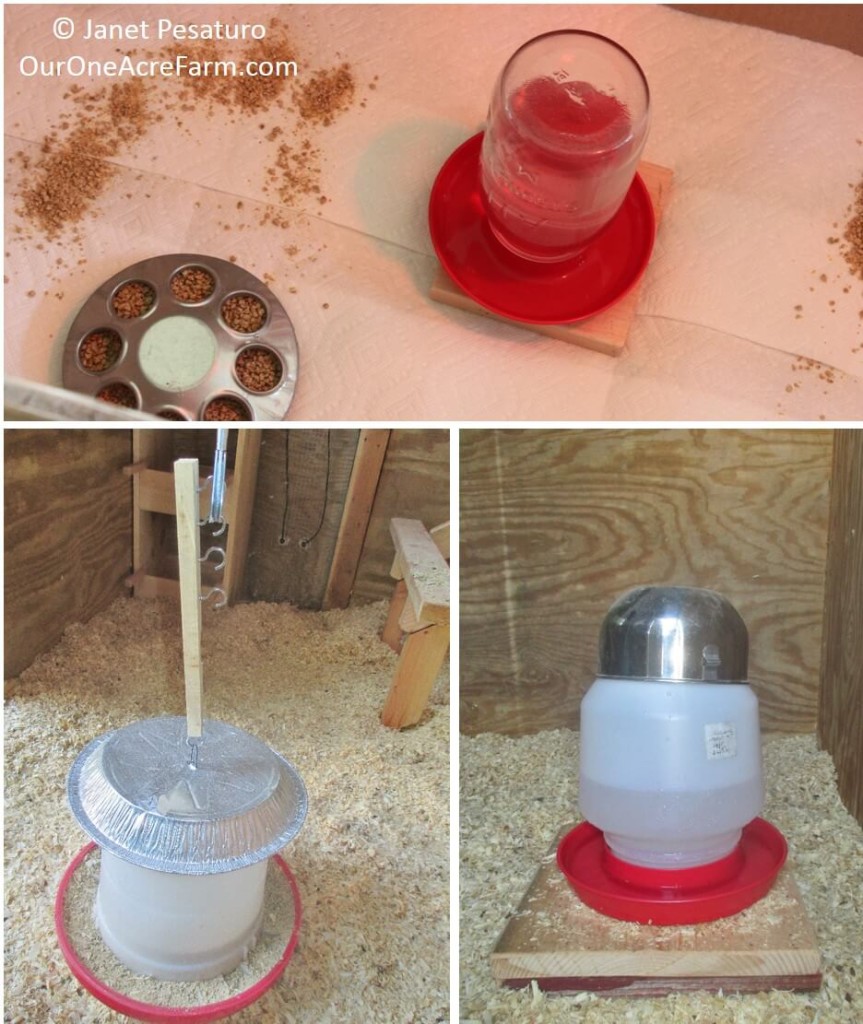
Clockwise from top left: Feeder for baby chicks; water fount for baby chicks; fount for older chicks with inverted bowl that prevents perching and boards that can be stacked to raise the fount; feeder for larger chicks and adults with inverted pie plate to prevent perching and a hanger that allows adjustment of height.
Chick grit should be offered if chicks do not have access to the outdoors, where they will ingest tiny stones in the dirt as they forage. It’s often said that they do not need grit if they are eating commercial chick feed (the contents of which have been finely ground), but I think it’s a good idea to get some grit into their gizzards as soon as possible. At some point, they will be going outdoors, or you will be giving them foods other than commercial feed, so it’s good to have grit already in the system.
A chick water fount is far better than an open tray of water into which the chicks can track litter and droppings. They can still scratch litter and droppings into the standard chick water fount, a 1 quart mason jar threaded into a plastic base (like the one in my photo), but they cannot walk through it or fall into it. Don’t use the plastic reservoir available for purchase with the base, as it is too light weight and can be knocked over by larger chicks. Eventually, chicks will try their developing wings and take great pride in perching atop the jar. That’s when it’s time for a larger fount, preferably one the prevents perching. I put a smooth metal bowl on the top of my water fount, because it’s too slippery for landing and perching. Notice also the shape of the reservoir of my water fount: it overhangs base, reducing the chance of litter and poop ending up in the water. Increase the height of the waterer as the chicks grow, to minimize contamination with litter, which they will inevitably scratch into it. I gradually stack 1 inch thick boards under the water fount, as you can see in the photo.
Water additives, such as electrolytes, vitamins, and probiotics designed for baby chicks, are good to have on hand in case your chicks spend a long time in transit, or simply appear droopy or otherwise stressed. Some commercial feeds have probiotics. Many people give their chicks a bit of yogurt for probiotics, but I’ve never done that because birds cannot the digest lactose in dairy products. Too much dairy could cause GI distress or even diarrhea.
A chicken coop, or a plan, at the very minimum, for housing your birds once they graduate from the brooder is an obvious necessity. Check out this Guide to Designing the Perfect Chicken Coop.
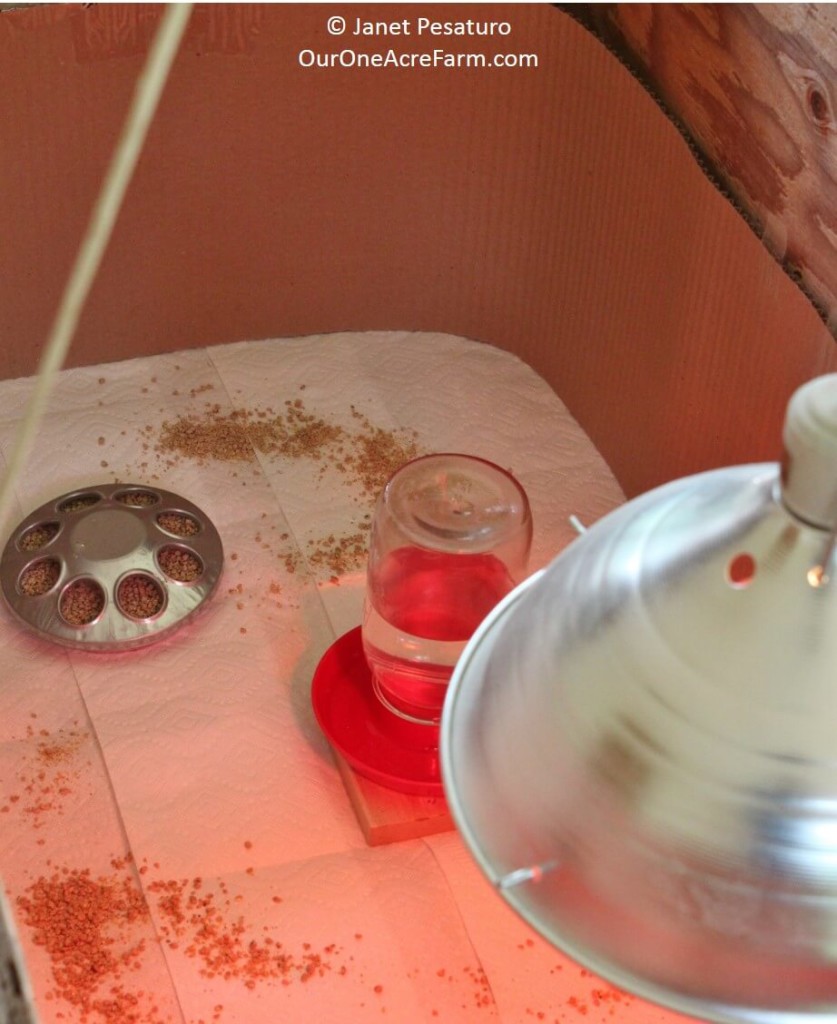
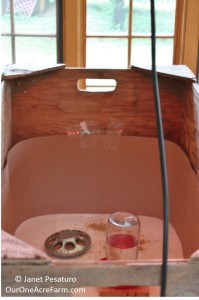
My brooder all ready for the chicks to arrive, with infrared heat lamp over one end of the rectangular box, feed sprinkled on paper towels, chick feeder, and chick water fount.
4. Setting up the brooder
I inherited an old 4 foot x 2 foot x 2 foot wooden box that was used as a brooder box at a nearby farm. I really like that rectangular shape, because you can keep the heat source over one end, so the chicks have the opportunity to venture off to the cooler end, and return to the warmer end when they want. This mimics life for chicks raised by a hen. They leave the warmth of her breast to forage with her for food, periodically stopping to warm up and nap beneath her.
Have your brooder box set up, with a layer of paper towels over the bedding and brooder guard in place. A few hours before your chicks are expected to arrive, turn on the heat source and adjust (the height, in the case of a bulb) until the temperature is 90-95 degrees F at the bottom of one end of the brooder. Right before you bring the chicks home, sprinkle some feed on the paper towels, and fill the feeder and water fount. I like to keep the fount in the middle of the box, so it’s easily accessible to chicks on both the cooler and warmer side of the box.
Keep in mind that the chicks need easy access to a 90-95 degree spot, but the entire brooder should not be that warm. You are trying to simulate an environment the chicks would have if raised by a hen. Chicks do not sit under the hen constantly. They spend a lot of time under the her warm body during their first few days, but go off with her to forage more frequently, and for longer periods of time, as they grow.
5. Chick Arrival Day
It’s a good idea to call your post office a day or two before the chicks are due, to request a phone call when the chicks arrive. Mine have always reached the post office in early morning, and I pick them up immediately. They come in a box like the one in the photo.

The typical box used to deliver chicks through the mail.
Gently remove chicks from the package one by one, dipping each one’s beak in water a few times before releasing it into the brooder box. Make sure they swallow the water: You can tell by the way they open and close their beaks a bit as they take in the water (my kids call that “chewing water”). Then watch them to make sure everyone is eating, drinking, and pooping. Watch to be sure they are comfortable with the temperature of the brooder. If they’re huddling together under the lamp, they’re too cold. If they’re staying as far as possible from the heat source, they’re too warm. Happy, healthy chicks will be eating, drinking, and running around with vim and vigor.
If any appear droopy, add electrolytes and vitamins to the water, if you haven’t already, and continue to dip the bird’s beak in water periodically. Some people even add sugar – about 1/3 cup per quart of water, to give them a burst of energy. What I put in the water depends on how long the chicks were in transit:
- For one night in transit, I added nothing to the water.
- For 2 nights in transit, I added vitamins, electrolytes, and probiotics.
- For 3 nights in transit, I added vitamins, electrolytes, probiotics, and sugar.
After the first 24-48 hours, I give them all plain water. I might resume one or all of these additives if chicks later develop problems.
6. The first few days
I keep the chicks in paper towels, changing them daily, for at least the first few days, and up to 2 weeks, depending on how the chicks are doing. That keeps the box clean, but more importantly, ensures that the chicks are eating food rather than litter. Provide a chick feeder too, though, so they’ll get used to it before you remove the paper towels and put them on litter. Continue to maintain a temperature of 90-95 degrees F in part of the box. Change the water daily, and more often if they get poop in it.
If the chicks had just a 1 night journey from the hatchery, all appear to be thriving, and the weather is warm (at least 80 degrees F) and mild, I might put them outside on greenery for an hour, as early as day #2. Here’s how I made a Baby Chick Playground. But don’t feel rushed. Chicks are delicate creatures, and those sent by mail have been subject to more stress than chicks under a hen. Keep an eye out for common chick problems, like diarrhea, constipation, toe picking, feather picking, and any other behavior that seems out of the ordinary.
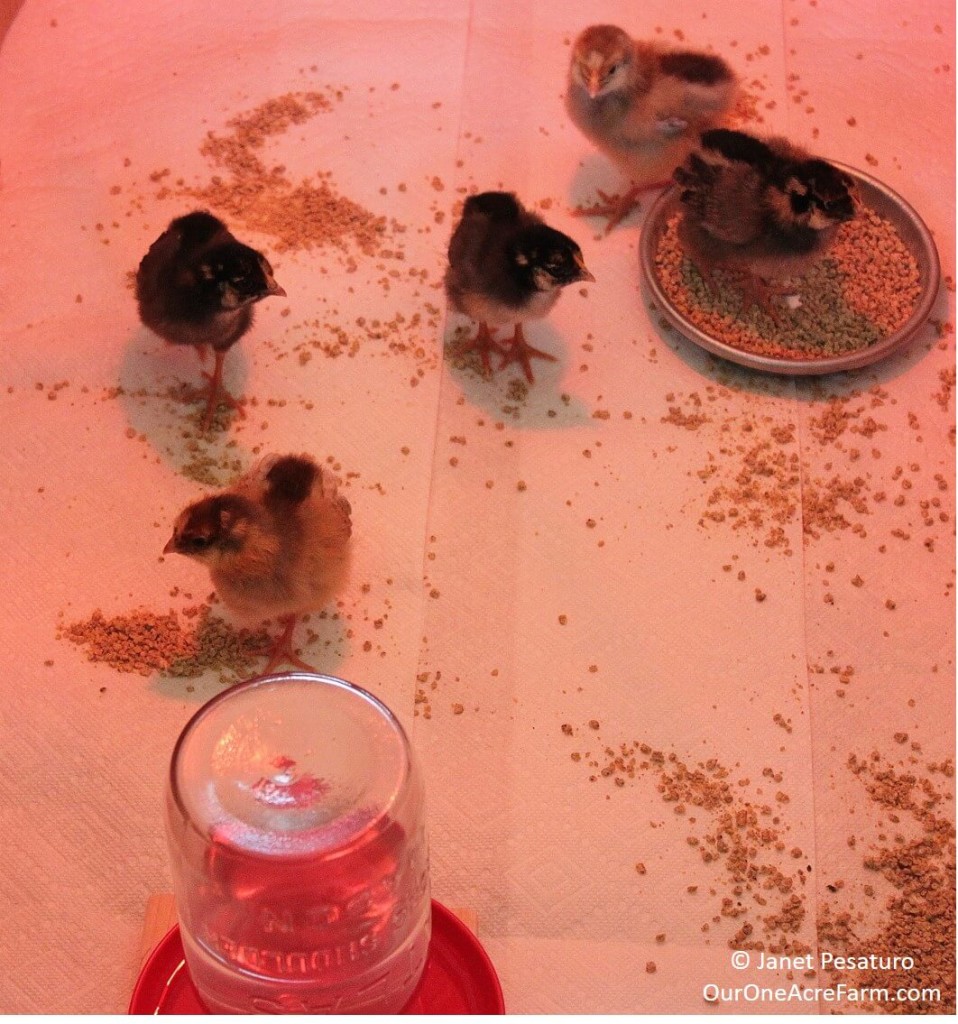
These chicks are active, they’re feeding, and they’re spaced out in the brooder, suggesting that the temperature is just right for them.
7. The First 6 Weeks: Warmth, Space, and Stimulation
Many sources say advise keeping the temperature (of part of the the chicks’ living area) at 90-95 degrees F for the entire first week, and reducing it by 5 degrees every week, until room temperature is reached. Doing a bit of math, this means on week 5, their warm up spot should be 70-75 degrees. Follow that if you feel you must, but I’ve found that chicks always progress more quickly than that. Mine avoid the 90-95 degree warm spot by the 3rd or 4th day, and seem to want the temperature to drop more quickly than 5 degrees per week. At this very moment, I have 5 week old chicks already in their coop with no supplemental heat, despite temperatures dipping to 60 degrees F at night. One of my neighbors routinely puts her chicks in the coop at 4 weeks, with no supplemental heat, and she starts hers earlier in spring.
Warmth and space are related. The more space the chicks have, the more heat is needed to keep it warm. Gail Damerow speaks to this relationship in her classic: “A Guide to Raising Chickens”. It’s a tremendously useful reference book, but its one short coming, in my opinion, is insufficient attention to the natural behaviors and preferences of chickens. Recommendations for spatial requirements are a glaring example. She recommends only 1/2 square foot of space per chick up to 4 weeks old, 1 square foot for 4-8 weeks old, 2 square feet for 8-12 weeks old, and about 3 square feet for 12+ weeks of age. She explains: “More isn’t necessarily better – if you give chicks too much space during cold weather, they’ll have trouble staying warm.
I disagree with that statement whole-heartedly. More space IS always better. I do not think it is humane to rely on the chicks huddling for warmth. Either provide sufficient supplemental heat, or raise chicks in warmer weather.
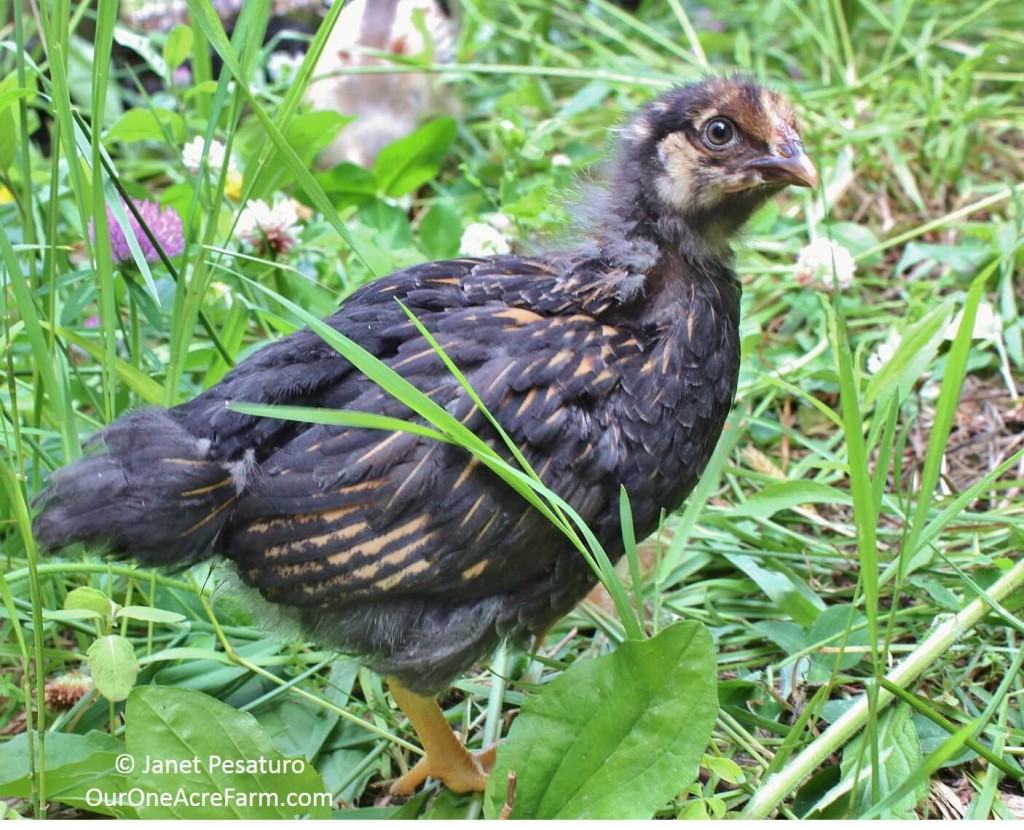
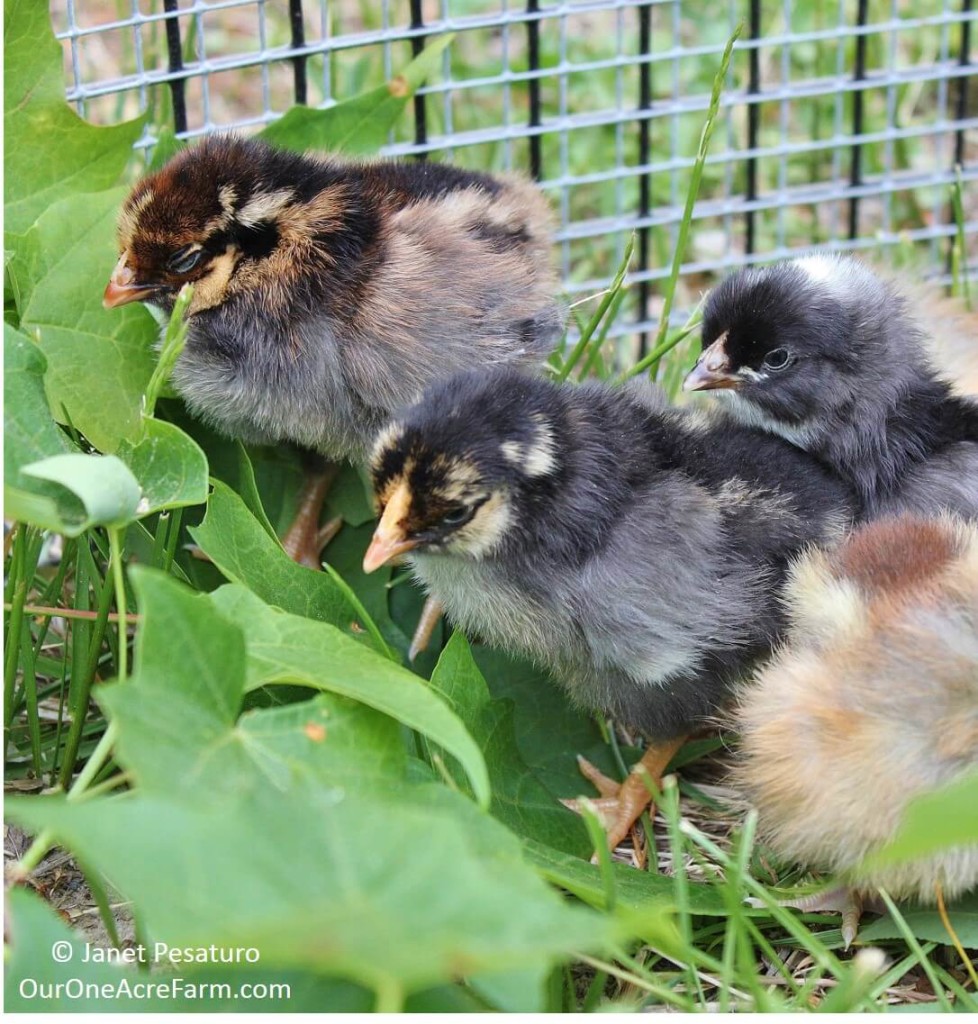
This 3-4 week old golden laced Wyandotte chick enjoys foraging with her 4 flock mates, among a diversity of plants in our 80 square foot enclosure.
According to the above spatial recommendations, in my 8 square ft brooder, I could keep 16 chicks up to 4 weeks of age. Picture that. It is very crowded, and with little stimulation other than each other, chicks are prone to toe picking and feather picking. This spring I raised 5 chicks in that 8 square ft box. That box sure didn’t give them the feeling of freedom and stimulation, for they erupted into joyful flight whenever I brought them to their 80 square foot outdoor enclosure.
Currently, my five 5-week old chicks occupy a 40 square ft coop and an 80 square ft run, for a total of 120 square ft. That’s 24 square feet per bird. It’s not freedom, but there’s enough space, vegetation, and insects to keep them actively foraging all day. And even that will be trampled to bare earth within a matter of weeks (a flock of 5 wild chickens living without handouts from humans would occupy about 12 acres, depending on habitat quality, as you can read in my post on Creating a Chicken Habitat). But by then, my young flock will be on limited free range in a large fenced yard.
So how much space you give your birds is your choice, but if you ever get to see how much they enjoy spacious habitat with good plant diversity, you might not feel good about the packing density commonly recommended in books.
Resources:
- Damerow, Gail. 1995. A Guide to Raising Chickens. Storey Communications, inc. Pownal, VT.
- How to Build an Ohio Brooder
Questions, comments, or tips for raising baby chicks? Make my day and leave a comment!

Please pin this image!